Honda CB750 Restoration (Not sure of the year, I think '79 or '80) | Page 4 | GTAMotorcycle.com

Honda CB750 Restoration (Not sure of the year, I think '79 or '80)

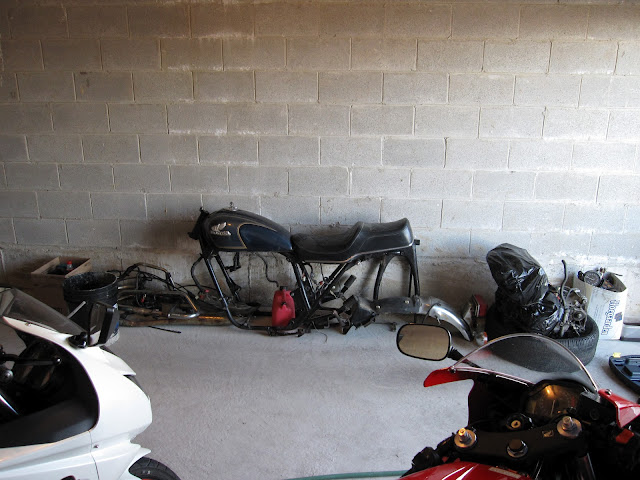
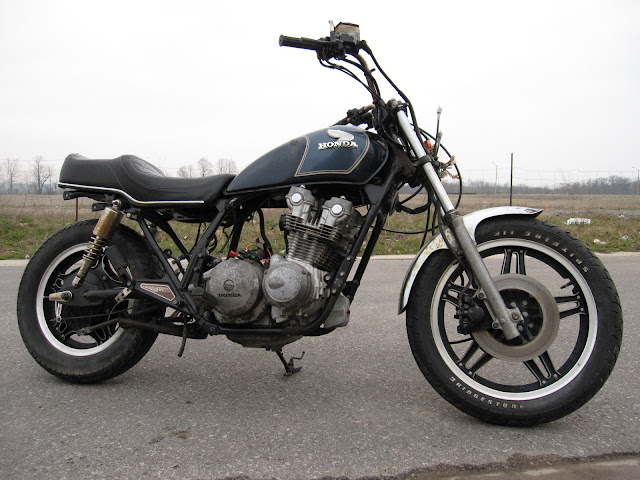
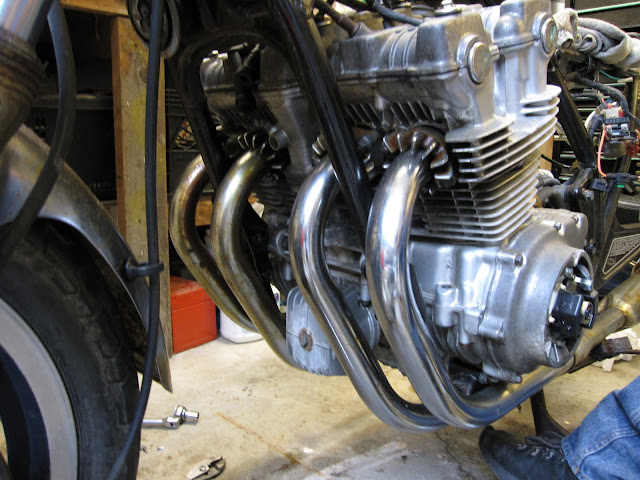
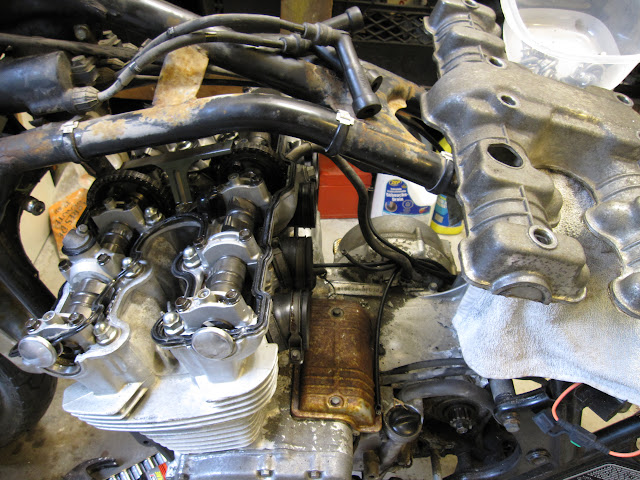
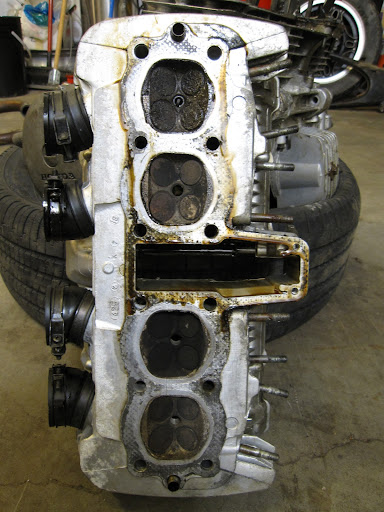
Nice project... if you have any questions I will do my best to help. I have an 81 CB900c my dad bought new back in the day and handed down to me (daily bike) and a 83 CB1000c I bought last year for a project. See my new thread here: http://www.gtamotorcycle.com/vbforu...Revival-and-Restoration&p=1542086#post1542086

I want to find a 750c for my next project and your thread is nice to see someone else with same enthusiasm to restore one of these Honda DOHC fours.

Great work!

Let me know if you need any parts for it, I can try and direct you to some.

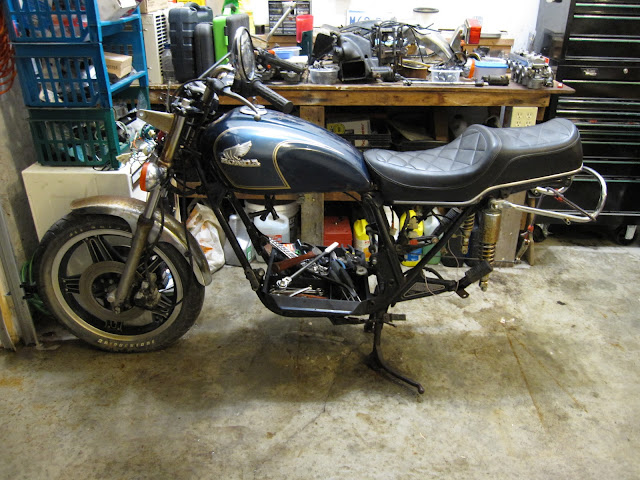
I'm wishing mine looked like yours right now...
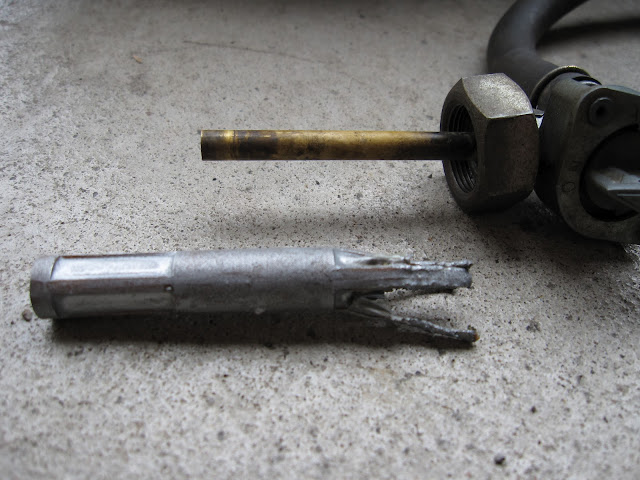
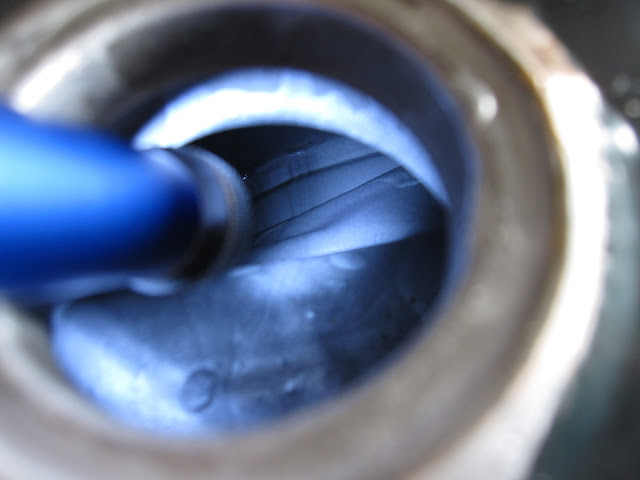
 
Any great success stories with spray paint???

I have rattle can painted frames before. I find rattle can paint to be terrible. It never gets hard and scratch resistant even with baking it on. I've only used Crapy Tire paint, though.

That was many years ago. If I was to DIY it now, I would borrow someones air sprayer and buy some decent paint from a shop.
 
Powder coat for the frame would be great, if you want to strip the bike down to the bare frame. If not, air sprayer is good, rattle can a last resort, although I have seen some rattle can jobs that look really good.
 
Powder coat for the frame would be great, if you want to strip the bike down to the bare frame. If not, air sprayer is good, rattle can a last resort, although I have seen some rattle can jobs that look really good.

It's pretty much bare frame now, I'll look into a powder coat job. See if it's affordable...
 
Well... It's time to get back to work on this project. Here's where I left off when the bike was still parked at my buddy's house in Georgina:

IMG_3859.JPG


And now it's back at my house so lets see if the pace picks up a bit :):

IMG_3947.JPG


Instead of worrying about paint and making it pretty, I'm going to focus on making it run sweet and THEN make it pretty.

First stop is the gas tank revisited. I'm going to try the recomended POR-15 fuel tank repair kit.

Update: POR-15 ordered.. $76.84 shipped... I hope this works
 
Last edited:
IT'S HERE!!! But it's missing a part... Everything is there to do what I need to do so I'm not super annoyed but I do like to get what I pay for, I'm missing a piece of fabric used for repairing holes in the tank. I dont have any holes so I'll survive. I'm going to send an email out to them :).

IMG_3948%255B1%255D.JPG


I'm going to try to treat my tank on Thurs or Fri.
 
Last edited:
Alrighty then... First day working on this bike in a looooong time. The fuel tank revisited...

First of all, HOLY CRAP POR-15 is a pain in the butt. So many specifics and for $80 you really want it done right the first time. Apparently if you mess up it's wayyyy harder to remove the stuff in order to start again.

Yup, it got ugly again...
IMG_3950.JPG


Petcock removed and taped off...
IMG_3951.JPG


Marine Clean, first step is this degreaser mixed 1:1 with hot water. Pour mixture in and swirl/shake the tank for 20mins. Then rinse with water.
IMG_3952.JPG


Not looking too different but what came out was pretty gross so I suppose the Marine Clean did its job...
IMG_3954.JPG


Next step is Prep & Ready Metal Prep. You pour it in the tank and rotate the tank every 20/30mins to ensure it contacts all parts of the tank. No more than 2hrs and then you rinse the tank with hot water.
IMG_3955.JPG


Before you add the POR-15 tank sealer, there must be absolutely no water in the tank or the product will not seal. So I rigged up this blow dryer to accomplish that mission.
IMG_3958.JPG


I rigged up a vacuum funnel to get the last bits of loose rust...
IMG_3960.JPG


Here's the interiour prior to the tank sealer... Not too bad, although I feel the muriatic acid did a better job.
IMG_3963.JPG


And then with the sealer poured in and rolled around...
IMG_3967.JPG


So, I've been at this all day and I still cant get all the extra sealer out of the tank. Apparently it causes problems if pooled areas are left alone... I just keep rolling the tank and hope that it will just be a really thick coat. I'll post up finish products later...
 
While I was blow drying my tank, I started to rebuild the bike to proceed with my "make it run nice and then make it pretty" plan.

Greasing the head bearings (correct name?)
IMG_3956.JPG


IMG_3957.JPG


Here's how she sits now...
IMG_3959.JPG


Stay tuned for more!
 
Well, rotated every 30mins untill the pool stopped moving... But that's the thing, there's a pooled section. I'll give it some extra curing time...

Now, who can point me in the right direction to purchase a fuel filter to install between the tank and carbs... This bike has no filter to begin with...

like the build - eager to see how the bike turns out. As for fuel filter, I've used fuel filters for riding lawn mowers before - seems to work fine. You can get them at home depot or lowes.
 
Well, rotated every 30mins untill the pool stopped moving... But that's the thing, there's a pooled section. I'll give it some extra curing time...

Now, who can point me in the right direction to purchase a fuel filter to install between the tank and carbs... This bike has no filter to begin with...

Cool looking one -

http://www.canadiantire.ca/AST/brow...ine+Style+Universal+Fuel+Filter.jsp?locale=en

More plain

http://www.canadiantire.ca/AST/brow...niversal+Lawn+Mower+Fuel+Filter.jsp?locale=en
 
So far today:

-Installed petcock back onto the tank and found that there was no air flow while blowing air into the tank when set to "ON". "RES" had perfect flow and "OFF" had none which is normal. So when I took the petcock off to inpsect, a piece broke off inside the tank (got it out) and it seems that this tank has an internal filter which got clogged from the POR-15. I think everything will be fine without that filter, I'll be installing one between the tank and carbs. (Thanks for the suggestions btw)

-Installed the swingarm, rear shocks, rear tire

-Intalled the handle bars

-Installed the engine

-Grilled cheese sandwich and coffee break

Here's the internal filter that busted off inside the tank... Hopefully not a big deal...
IMG_3969.JPG


As promised... The finished product after using POR-15... I'm pretty satisfied with the results...
IMG_3970.JPG


Last pic before parking it for the day...
IMG_3972.JPG
 
Last edited:
Update:

Sunday- Rebuilt the carbs. No pics though, you saw them come apart so pics of them going together would be boring...

Monday- I kicked the bikes ass tonight. The original plan was to just remove the head to deal with my spark plug issue, but one thing lead to another...

Removed what I believe are called the crash bars...
CB%20750%20Custom%20075.jpg


Here they are off the bike...
CB%20750%20Custom%20076.jpg


Then removed the exhausts...
CB%20750%20Custom%20078.jpg


Here they are off the bike...
CB%20750%20Custom%20077.jpg


Next I removed the valve cover/cam cover/cylinder head cover (whatever you prefer)...
CB%20750%20Custom%20079.jpg


CB%20750%20Custom%20080.jpg


CB%20750%20Custom%20082.jpg


After loosening the cam chain tensioners, I removed the cam holders/cam journals...
CB%20750%20Custom%20083.jpg


Here are the camshafts almost ready to come out...
CB%20750%20Custom%20084.jpg


And they're out...
CB%20750%20Custom%20085.jpg


CB%20750%20Custom%20086.jpg


Trying to stay organized, these are the valve lifters and shims...
CB%20750%20Custom%20087.jpg


And the kicker of the night, I thought I could just sneak the head head off with the engine still in the frame... I was wrong, had to pull the engine out last minute...
CB%20750%20Custom%20088.jpg


Definately needs a cleaning...
CB%20750%20Custom%20090.jpg


Finally, mission accomplished...
CB%20750%20Custom%20091.jpg


The ever increasing organized mess on my work bench...
CB%20750%20Custom%20089.jpg


Here's my nights work on the floor...
CB%20750%20Custom%20092.jpg


Here's how she sits at the moment...
CB%20750%20Custom%20093.jpg

Hi ,
I have a 82 CB900 pretty much the same engine .
When you took the head off did you do a valve stem seal replacement ?
And did you do a valve lap job ?
That is a must just because of the age of the bike .
I am a member of the Honda DOHC site and maybe you should read a bit about the things I asked about .
 
great thread! keep up the good work :p

have you considered picking up a billet block for your bike?

index.php


cheers,
Kelvin
 
Last edited:
Hi ,
I have a 82 CB900 pretty much the same engine .
When you took the head off did you do a valve stem seal replacement ?
And did you do a valve lap job ?
That is a must just because of the age of the bike .
I am a member of the Honda DOHC site and maybe you should read a bit about the things I asked about .

It seems I acknowledged your post about the 750c forum and then forgot about it, that forum is going to help me quite a bit it seems.

I did not do anything you asked. But the engine is going to come out again later. I just want to make sure I can make the bike run half decent before investing more time into it. I will read into what you're asking about on the other forum though.
 
So far today:

-Carbs and airbox installed

-Discovered that the piece that broke off in the tank is actually a portion of a replaceable fuel filter, the other postion was stuck where the petcock mounts... I called Markham Outdoor Power, I can't get the the filter anymore but I could order an updated petcock to get the filter that's included with that... $65.00... hmmm

-Cleaned up and installed battery tray and wiring

That's all for today... Next I need to figure out if I want this expensive in tank fiter or a cheap in-line filter... After I sort that out I can fuel it up and see how it's running...

And then I kept going lol... So I bought an in line filter from the lawnmower section of CT and some hose and installed the fuel tank and my filtered line to the carbs.
 
Last edited:
great thread! keep up the good work :p

have you considered picking up a billet block for your bike?


cheers,
Kelvin

I hadn't considered it, looks cool as hell though!
 

Back
Top Bottom