





Enough of COVID...what are you doing to the house?

I am thinking way too hard about whether to install the island back and side panels first and butt the flooring against them, or run the flooring up to the cabinet base and only underneath the panels.

If the flooring goes under the panels, I would probably aim to leave about a 1/8 inch gap, but nothing is ever perfect. The base is visible as you come up the stairs, so I want it to look clean. I could caulk the seam.

Butting the flooring against the panels would be easier for the flow of the project and avoids worrying about the gap or the panels settling and putting pressure on the floor later.

What would you guys do?
Have the floor go under the panels, and have the panels touch the floor. Don't overthink floor movement, its gonna move even if an elephant sits on your island -- and you'll never notice.

Don't caulk around the base of cabinets or toilets - you don't want moisture to get trapped under them - it turns into a diadaster!
 
Buddy did the house lift. One of the jacks jammed when lowering the house twisting the structure. In the end the contractor walked away, no blood from that stone.... Luckily it was not a total loss but it had to be gutted to fix it. Ironically, the building inspector required them to double the number of jacks and it was one of those that jammed.
That's why you use screw jacks -- not hydraulic for a cottage lift (and I'd never use an air jack -- too coarse for 1/2" moves)
After all the pain, over eight foot ceilings in the basement, the big basement windows were nice--legal egress was pretty easy to achieve. From the outside the foundation looked ass as the old blocks were those typical 1940s ones with the "fancy" outside face and the new ones were the same size but plain face...


I think things are being a little over simplified on here... You obviously just can't jack it up by the centre beam... You will need to add multiple temporary beams, either through basement windows or through cuts in the foundation or both.
In a center beam simple frame, you can jack the center beam and knock out every 5th block on the parallel walls to jack the plate/rim joist. No steel beams, no cribbing. The whole structure is about 18-20 tons. 30 strong Polaks could lift that by hand.
In the above case mentioned these were steel I beams spanning the width of the building, removed after the job. All jacks move at the same time keeping the building level and "square", well in theory. I am sure one could hillbilly it with bottle jacks but do you want to be under the building your jacking... dial 9 and 1 and wait.
Bottle jacking a small wood frame house is done in a wave from front to back, 1/2" lift at a time. Jack, replace with a place the screw jack, move the hydraulic jack -- rinse and repeat.
One more thought, building permits open a bunch of cans of worms on this, bring things touched up to new code. Plumbing is being touched, stairs, HVAC, whatever. All became one headache after another for my buddy that was doing most those parts himself.
You have all that, but in the great scheme of things, moving mechanical in an unfinished basement isn't that big of a deal.

I would probably skip the building permit part (but that's just me). It's a relatively small project and unless neighbors are prickish, I doubt anyone local cares.

MP is a p.eng, he can drop his stamp on the building department manager's forehead if need be.
 
Funny , my friend Doug , who just retired as head of municipal planning and the building dept of ironically, Wasaga Beach . They have two guys that are dedicated to driving around and looking at project xx . Who put up the shed that now sleeps six , who got a permit for a single car garage and decided to skip the footing inspection ( since they poured a double slab. ) . Wasaga is not east Podunk. You’ll need permits unless you want to pay large fines and get stop work orders while they tie you up for months because they can. That town is on its way to a small city , don’t F around and find out .


Sent from my iPhone using GTAMotorcycle.com
 
Funny , my friend Doug , who just retired as head of municipal planning and the building dept of ironically, Wasaga Beach . They have two guys that are dedicated to driving around and looking at project xx . Who put up the shed that now sleeps six , who got a permit for a single car garage and decided to skip the footing inspection ( since they poured a double slab. ) . Wasaga is not east Podunk. You’ll need permits unless you want to pay large fines and get stop work orders while they tie you up for months because they can. That town is on its way to a small city , don’t F around and find out .


Sent from my iPhone using GTAMotorcycle.com
This is my concern. A neighbour built a garage while they renovated their main house...turns out they were living in the garage while they were playing fast and loose with their house....5 years of stop work orders and things basically grinding to a halt for that time.

If you happen to speak to Doug...I'd appreciate confirmation if I need a permit to insulate / put up drywall in the basement as it's not living space, but just finished storage space. Approx 4" shy of min living space height.

I would get a permit for the washroom / electrical as that's just playing with fire. And I doubt that a variance would be granted for lower than build height.

EDIT: Reading the rules, it doesn't look like I can put up drywall in there even if it's just storage. I want to insulate it as a minimum as there's a ton of heat leaving due to the basement being wholly unfinished.
 
Last edited:
If you want weird expensive receptacles, look at unifit too.

Nice, wife is not happy with Adorne color choices.

Have the floor go under the panels, and have the panels touch the floor. Don't overthink floor movement, its gonna move even if an elephant sits on your island -- and you'll never notice.

Don't caulk around the base of cabinets or toilets - you don't want moisture to get trapped under them - it turns into a diadaster!

Got it, thanks.
 
What is a reasonable opening for a 30 inch stove? Wife wants it tight, but I feel like that could get painful later. Go with the minimum 30 inches, or leave 30 1/8?
 
What is a reasonable opening for a 30 inch stove? Wife wants it tight, but I feel like that could get painful later. Go with the minimum 30 inches, or leave 30 1/8?

There’s trim strips for this. We have silicon ones that cover the gaps but one of the higher end stoves we were looking at came with chrome or stainless ones too.
 
What is a reasonable opening for a 30 inch stove? Wife wants it tight, but I feel like that could get painful later. Go with the minimum 30 inches, or leave 30 1/8?
Stoves are typically 29-7/8, so 30-1/8 is the tightest I go, this leaves 1/8” wiggle room on each side. I prefer 30-1/4 for a bit more wiggle room.
 
So this is weird...
I want to put one of those plastic utility sinks in my furnace room... For utility.
I'm lookin' at the box stores and even FB... I will probably get rid of it once I'm done painting this winter...
Jeebus... There kinda spendier than I thought. FB offerings are too far away.

'Couple dsys ago I head out to go somewhere...
'Neibor three down has put one at the curb, faucet and all... So... got the sink for free.

Came to learn copper prices have increased greatly since I last did any plumbing..
$34 for a 6' length of 1/2"... ?
It's the same $34 for 100' of PEX.
'Guess im PEXin' this b***
 
Last edited:
So this is weird...
I want to put one of those plastic utility sinks in my furnace room... For utility.
I'm lookin' at the box stores and even FB... I will probably get rid of it once I'm done painting this winter...
Jeebus... There kinda spendier than I thought. FB offerings are too far away.

'Couple dsys ago I head out to go somewhere...
'Neibor three down has put one at the curb, faucet and all... So... got the sink for free.

Came to learn copper prices have increased greatly since I last did any plumbing..
$34 for a 6' length of 1/2"... ?
It's the same $34 for 100' of PEX.
'Guess im PEXin' this b***

That urinal will stay...
 
So this is weird...
I want to put one of those plastic utility sinks in my furnace room... For utility.
I'm lookin' at the box stores and even FB... I will probably get rid of it once I'm done painting this winter...
Jeebus... There kinda spendier than I thought. FB offerings are too far away.

'Couple dsys ago I head out to go somewhere...
'Neibor three down has put one at the curb, faucet and all... So... got the sink for free.

Came to learn copper prices have increased greatly since I last did any plumbing..
$34 for a 6' length of 1/2"... ?
It's the same $34 for 100' of PEX.
'Guess im PEXin' this b***
PEX is better than copper, so you win on value and performance.

The downside is PEX needs special tools. Not particularly expensive, but you need them.

Tools for the low end pex b systems run about $100 for a diy setup, and between and around $1000 for the better Pex a system. You can get cheaper manual expanders for Pex a — but I wouldn’t’ they are not diy friendly.

The simplest supply tie in is to use sharkbite tees to tie onto your copper, the Pex to your fixtures. No soldering (fire and wet pipe solder leak risks eliminated).

Drains are usually the Achilles heel for diy. There’s no physics in water supply for household projects, but drains have hydraulic and vacuum requirements to be considered if you want proper draining and sewer gas management.
 
Last edited:
PEX is better than copper, so you win on value and performance.

The downside is PEX needs special tools. Not particularly expensive, but you need them.

Tools for the low end pex b systems run about $100 for a diy setup, and between and around $1000 for the better Pex a system. You can get cheaper manual expanders for Pex a — but I wouldn’t’ they are not diy friendly

Drains are usually the Achilles heel for diy. There’s no physics in water supply for household projects, but drains have hydraulic and vacuum requirements to be considered if you want proper draining and sewer gas management.

How is needing to buy new tools a "down side"..?
From what I've seen there are 4 or five "systems" for connecting PEX.
I'm going with the simplest one I think..
Its a ring-clip sorta affair that uses a ratcheting set of pliers to set the fastener.

'Drain took me 20min to get done.
Luckily there's a rough in present so it was just a matter of tapping into it...
 
How is needing to buy new tools a "down side"..?
From what I've seen there are 4 or five "systems" for connecting PEX.
I'm going with the simplest one I think..
Its a ring-clip sorta affair that uses a ratcheting set of pliers to set the fastener.

'Drain took me 20min to get done.
Luckily there's a rough in present so it was just a matter of tapping into it...

I think that’s what I used to attach some stuff a while back. Practice on some scrap first.
 
How is needing to buy new tools a "down side"..?
From what I've seen there are 4 or five "systems" for connecting PEX.
I'm going with the simplest one I think..
Its a ring-clip sorta affair that uses a ratcheting set of pliers to set the fastener.

'Drain took me 20min to get done.
Luckily there's a rough in present so it was just a matter of tapping into it...
There are 2 systems, Pex A and B.

Pex A uses metal crimp rings, Pex B uses plastic rings. They have different fittings.

Pex B is diy stuff, plumbers don’t often use it. You can get pipe, fittings and tools at big box hardware stores - with the exception of shower valves - the usually need a copper to pex coupling soldered in.

Pex A is what plumbers use. Fewer fittings, far less pressure/volume loss, pex ready fixtures (no soldering), and a bit more robust, and more sizes. Not available at big box stores, Emco, Wolsley, or plumber trade suppliers sell this. Tools cost a lot more.

Both systems, and copper, can use sharkbite fittings.


'Drain took me 20min to get done.
Luckily there's a rough in present so it was just a matter of tapping into it...
Got a pic?
 
There are 2 systems, Pex A and B.

Pex A uses metal crimp rings, Pex B uses plastic rings. They have different fittings.

Apparently the PEX A system offers 25% better flow too, but... I've heard from one plumber... "yeah... that's what they say, but you won't notice the difference in your house".

For me this is just a small project... I've always used copper so 'interested in expanding my horizons.

Just to be safe though, I'm isolating the PEX by installing shut offs between the copper and PEX.
This way if I make any mistakes with the PEX I dont have to shut off water to the whole house while I un-fuk it.
 
Apparently the PEX A system offers 25% better flow too, but... I've heard from one plumber... "yeah... that's what they say, but you won't notice the difference in your house".

For me this is just a small project... I've always used copper so 'interested in expanding my horizons.

Just to be safe though, I'm isolating the PEX by installing shut offs between the copper and PEX.
This way if I make any mistakes with the PEX I dont have to shut off water to the whole house while I un-fuk it.
PEX A needs fewer fittings because it has about 1/2 the bend radius so fewer fittings, and it’s fitting ID is about 30% larger, so less restrictive. You won’t notice PEX B pressure loss with most fixtures, it’s usually noticeable in showers and high flow faucets.

Shutoffs might be overkill, pex b is very diy friendly and hard to f-up - most diy leaks or issues are with drains (abs). But use shutoffs if you need peace of mind.
 
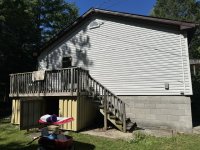
After lots of back and forth…wife wants a sunroom in this spot. Which would be a very convenient way to add stairs to the basement that are covered from the elements.

1788788925301.jpeg

Good thing she wants the fence done at the house first!

Trench digging planned for this week up there so should be a fun experience!
 
Back
Top Bottom