DIY Fairing Repair - DIY soldering abs plastic

Bweixz

Well-known member
Site Supporter
I was wondering if anyone had attempted soldering a broken fairing and how it worked out?!

I have been reading up on it http://faq.ninja250.org/wiki/Plastics_repair_with_ABS_cement as well saw a couple youtube (looked pretty solid), although at first i was skeptical and was going to just buy a new fairing but now i might just give it a go to save a couple hundred bucks.

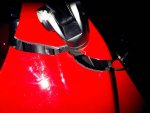
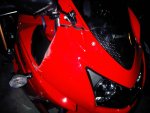
My upper fairing right under the bolt of the right mirror bolt is completely snapped off, only thing that is keeping it from flying off is since its attached to the winshield lmao soooo i'm going to attempt to solder it together before it just flys off soon.

Another concern is the paint, i figured out my paint on my 09 ninja 250 on Color Rite http://www.colorrite.com/ but they don't ship to Canada :( anyone happen to know a place where they sell ninja paint for decent prices around here?

Any input would be greatly appreciated.
 
I don't know anything about ABS cement, but I'm currently testing out a plastic welding method using a soldering iron. In my case the breaks in the plastic panel were clean, that is, I didn't have any missing pieces. What I did was heat up the plastic on either side with a soldering iron and do a sort of cross stitch pattern from one piece to the other. The melted plastic would cool and harden almost instantly once heat was removed leaving two pieces bonded together. I repeated along the back of the break. I've since sanded this down and applied some bondo between the two. That's currently drying. Following this I'll smooth it with some more sanding and test the (relative) flexibility. It needs to be able to stand up to some 100+km velocities after all.

If it holds I'll do some more sanding and proceed to paint. If not then it's back to the drawing board, or maybe look into this abs cement.

http://www.youtube.com/watch?v=EqAA4Zg7zyw&feature=related
http://www.youtube.com/watch?v=qb_u-KiQRrU
 
Or you could just pm " Cheekeebandito" and have him plastic weld and re paint your part back to new.

Alright PMed thanks!

what happened to your bike o.O

niiice curve, going deep into it ... then sand said effff youuuu so then i slid into the curb ... fairings got iced stupid me but lesson learned. First time going down luckily it was the curb not a parked car


They have a distributor in Quebec, that's why they wouldn't ship from the States.
http://www.dpars.com/colorrite.aspx

oooo could not find that lmao thanks!

I don't know anything about ABS cement, but I'm currently testing out a plastic welding method using a soldering iron. In my case the breaks in the plastic panel were clean, that is, I didn't have any missing pieces. What I did was heat up the plastic on either side with a soldering iron and do a sort of cross stitch pattern from one piece to the other. The melted plastic would cool and harden almost instantly once heat was removed leaving two pieces bonded together. I repeated along the back of the break. I've since sanded this down and applied some bondo between the two. That's currently drying. Following this I'll smooth it with some more sanding and test the (relative) flexibility. It needs to be able to stand up to some 100+km velocities after all.

If it holds I'll do some more sanding and proceed to paint. If not then it's back to the drawing board, or maybe look into this abs cement.

http://www.youtube.com/watch?v=EqAA4Zg7zyw&feature=related
http://www.youtube.com/watch?v=qb_u-KiQRrU

oooo let me know how it goes! yeah i was thinking of just following the guide but was wondering if someone more experienced could lend a hand hahaha need to buy a solder too...here i come canadian tire
 
Last edited:
i had cheekybandit do mine a year ago and i was very pleased with the result. He managed to match the paint exactly and it was difficult because it was a two tone colour.
 
Use a zip-ty as filler when using the soldering iron method. Google has some great tutorials.
 
If you want a nice finish, you will need someone with the right equipment (not cheap) and skill. If you don't care about finish (like race bike, or a part which is sort of out of sight) and care about cost, it's easy to do with some practice. I use a hot gun with home made nozzle. The repairs I have made are strong and are not going anywhere.

I personally don't like the iron method, because it's messier and takes more time to make the finish nice.
 
make sure you drill a hole at the end of the crack so that it doesn't spread
 
I do a lot of fairing work, you pretty much have to if your a track junkie. A few things I've learned

1.) Fiberglass and bondo are your best friend, but it takes time to get good at using them. They are messy, wear a respirator, you do not want to breath the fumes.
2.) Both can be had at canadian tire for about $25 for the medium sized kits.
3.) Fiberglass on the inside, bondo to fill the gap where the plastic is missing.
3.) Any time you fix a fairing, your talking about a repaint, unless its a track bike.
4.) If your the kind that needs a pristine bike to park infront of starbucks, the fairing repair is simple enough, but you'll want a pro to paint. If your like me and don't really care, primer, black enamel and some clear coat spray bombs are good enough for me. You can repaint all of your fairings for about $80 in paint from CT.
5.) Fiberglass does not adhear to smooth surfaces, I use utility knife to score the surface heavily before applying fiberglass, use 2 layers of fiberglass, do them at the same time for a better bond, don't skimp on the surface area. Any flex in the fiberglass/fairing will result in a paint crack. Typically fiberglass is more rigid than the rest of the fairing, but use 2 layers to be sure.
6.) Bondo starts to set in about 10 minutes, once it does, don't mess with it, you can always sand and try again. Use small batches.
7.) Bondo needs to be sanded perfectly flush, paint will not hide anything.
8.) paint many very thin coats, full paint strokes before direction changes, or you will get run lines
9.) wear a respirator, not one of those cheap 3M masks if your going to paint or fiberglass.
10.) paint will get everywhere, do not do this in your house, do it in a shed or outside, anything you thought would be fine, will be covered in a light coat of paint. Paint is 90% prep, 10% paint.
 
make sure you drill a hole at the end of the crack so that it doesn't spread


hahaha its not a crack its a clean snapp off only thing thats holding it together is the wind shield so i still can ride, gotta find the time to bring it to cheekeebandito


IMG01666-20120316-2328.jpgIMG01667-20120316-2328.jpg IMG01665-20120316-2328.jpg
 
I do a lot of fairing work, you pretty much have to if your a track junkie. A few things I've learned

1.) Fiberglass and bondo are your best friend, but it takes time to get good at using them. They are messy, wear a respirator, you do not want to breath the fumes.
2.) Both can be had at canadian tire for about $25 for the medium sized kits.
3.) Fiberglass on the inside, bondo to fill the gap where the plastic is missing.
3.) Any time you fix a fairing, your talking about a repaint, unless its a track bike.
4.) If your the kind that needs a pristine bike to park infront of starbucks, the fairing repair is simple enough, but you'll want a pro to paint. If your like me and don't really care, primer, black enamel and some clear coat spray bombs are good enough for me. You can repaint all of your fairings for about $80 in paint from CT.
5.) Fiberglass does not adhear to smooth surfaces, I use utility knife to score the surface heavily before applying fiberglass, use 2 layers of fiberglass, do them at the same time for a better bond, don't skimp on the surface area. Any flex in the fiberglass/fairing will result in a paint crack. Typically fiberglass is more rigid than the rest of the fairing, but use 2 layers to be sure.
6.) Bondo starts to set in about 10 minutes, once it does, don't mess with it, you can always sand and try again. Use small batches.
7.) Bondo needs to be sanded perfectly flush, paint will not hide anything.
8.) paint many very thin coats, full paint strokes before direction changes, or you will get run lines
9.) wear a respirator, not one of those cheap 3M masks if your going to paint or fiberglass.
10.) paint will get everywhere, do not do this in your house, do it in a shed or outside, anything you thought would be fine, will be covered in a light coat of paint. Paint is 90% prep, 10% paint.

Hmm now i think i'll actually give it a go myself if i can get a day off work i will go for it LOL thanks for the sweet tips time to hit up CT hopefully i can get that hard part done in a day
 
Hmm now i think i'll actually give it a go myself if i can get a day off work i will go for it LOL thanks for the sweet tips time to hit up CT hopefully i can get that hard part done in a day

I did something similar last year. Was a fun project, you could look at it here:
http://www.zxforums.com/forums/zx-6r-forum/52430-paint-job-write-up.html

This year I'm doing another fun project, I'm creating a negative mold (i have a spare set of fairings) and than making a new set of carbon fiber fairings. I'm not doing it for weight or whatever, just for fun.

Just some tips, don't be cheap on the fiberglass and dont rush. If you rush it, the finished product wont be nice. Also don't cheap out on the paint, especially the clear. You can't really get your hands on the good stuff (some new law passed last year), but if you have a mechanic friend, ask him if you could use his booth/paint for a price of course :)

OOOOH man that's a sweet fixup with the matte black sir hahaha. I was wondering which fiberglass brand and where you bought all the supplies you used were from?!? I have zero experience/knowledge in this handyman business so this i going to be a first for me! Thanks for all the help guys really appreciate it.
 
I'm going to jump in , there's some truly horrible advice being offered here, to save a couple of bucks...... Firstly, fibreglass doesn't flex the same as ABS plastic..... this results in cracking again , in the not too distant future..... Come and see the garbage fairings hanging in my garage, if you don't believe me...... Slathering up your fairings with fibreglass will complicate repairs after they crack again.... this all needs to be removed before doing a proper repair..... it also adds a lot of weight...... removing the resin results in even more damage, because you end up using power tools to do it.... it's not easy to remove ! Plastic welding is the only way to repair plastic properly....... it adds almost no weight to the fairing , and flexes exactly the same as your fairing was intended to do..... Secondly, bondo ........ Bondo is made for repairing metal (with very little flex) ... when your fairing flexes (during removal or vibration transmitted from bumps or engine vibration) it can crack (and usually does eventually) and out pops a chunk of bondo , taking your paint with it...... and it's also difficult to remove for proper repairs, adding to the proper repair process..... I use a flexible polyester filler , that's designed for use on flexible plastic....... it is a 2 part filler that sands nice and smooth and is undetectable if applied properly.... A good repair will require very little filler....... I'm at the point where I won't even consider repairing a fairing anymore that's been fibreglassed and bondo'd , and covered in rattle can garbage paint...... Just waaaay too much work and aggravation...... My suggestion is to fix it right the first time, and be done with it...... Plastic welding isn't that expensive, adds no weight , is permanent, and paints over easily..... Fix plastic with plastic, and fix fibreglass with fibreglass.............. Just my .02 , Cheers, Les
 
OOOOH man that's a sweet fixup with the matte black sir hahaha. I was wondering which fiberglass brand and where you bought all the supplies you used were from?!? I have zero experience/knowledge in this handyman business so this i going to be a first for me! Thanks for all the help guys really appreciate it.

You can go to NAPA to buy some fiberglass.
For my next project, CF Fairings, I'm actually going to buy most of the stuff from plasticworld (by allen and sheppard). I've heard a lot of good things about it.

Also no worry's about not having experience. It's your first bike, have some fun with it:) That's what it's there for!
 
I'm going to jump in , there's some truly horrible advice being offered here, to save a couple of bucks...... Firstly, fibreglass doesn't flex the same as ABS plastic..... this results in cracking again , in the not too distant future..... Come and see the garbage fairings hanging in my garage, if you don't believe me...... Slathering up your fairings with fibreglass will complicate repairs after they crack again.... this all needs to be removed before doing a proper repair..... it also adds a lot of weight...... removing the resin results in even more damage, because you end up using power tools to do it.... it's not easy to remove ! Plastic welding is the only way to repair plastic properly....... it adds almost no weight to the fairing , and flexes exactly the same as your fairing was intended to do..... Secondly, bondo ........ Bondo is made for repairing metal (with very little flex) ... when your fairing flexes (during removal or vibration transmitted from bumps or engine vibration) it can crack (and usually does eventually) and out pops a chunk of bondo , taking your paint with it...... and it's also difficult to remove for proper repairs, adding to the proper repair process..... I use a flexible polyester filler , that's designed for use on flexible plastic....... it is a 2 part filler that sands nice and smooth and is undetectable if applied properly.... A good repair will require very little filler....... I'm at the point where I won't even consider repairing a fairing anymore that's been fibreglassed and bondo'd , and covered in rattle can garbage paint...... Just waaaay too much work and aggravation...... My suggestion is to fix it right the first time, and be done with it...... Plastic welding isn't that expensive, adds no weight , is permanent, and paints over easily..... Fix plastic with plastic, and fix fibreglass with fibreglass.............. Just my .02 , Cheers, Les

Les!! I wish you could post a detailed tutorial (and that it would be stickied onto the technical thread) on how you plastic weld repair fairings lmao i bet a lot of beginners who want to give it a go would appreciate it too hahah since i really want to try as i feel there may be more cracked fairings i might encounter in the future (my friends are gettin their M2s and bikes soon) + me lmao
 
I'm going to jump in , there's some truly horrible advice being offered here, to save a couple of bucks...... Firstly, fibreglass doesn't flex the same as ABS plastic..... this results in cracking again , in the not too distant future..... Come and see the garbage fairings hanging in my garage, if you don't believe me...... Slathering up your fairings with fibreglass will complicate repairs after they crack again.... this all needs to be removed before doing a proper repair..... it also adds a lot of weight...... removing the resin results in even more damage, because you end up using power tools to do it.... it's not easy to remove ! Plastic welding is the only way to repair plastic properly....... it adds almost no weight to the fairing , and flexes exactly the same as your fairing was intended to do..... Secondly, bondo ........ Bondo is made for repairing metal (with very little flex) ... when your fairing flexes (during removal or vibration transmitted from bumps or engine vibration) it can crack (and usually does eventually) and out pops a chunk of bondo , taking your paint with it...... and it's also difficult to remove for proper repairs, adding to the proper repair process..... I use a flexible polyester filler , that's designed for use on flexible plastic....... it is a 2 part filler that sands nice and smooth and is undetectable if applied properly.... A good repair will require very little filler....... I'm at the point where I won't even consider repairing a fairing anymore that's been fibreglassed and bondo'd , and covered in rattle can garbage paint...... Just waaaay too much work and aggravation...... My suggestion is to fix it right the first time, and be done with it...... Plastic welding isn't that expensive, adds no weight , is permanent, and paints over easily..... Fix plastic with plastic, and fix fibreglass with fibreglass.............. Just my .02 , Cheers, Les

Wait so you don't use any fiberglass at all? Even on the back side for reinforced strength?

For my fix i didn't use fiberglass, rather plastifix which was a little expensive and hard to find. Apparently it's used a lot in the abs industry for fixes (lots of videos of it online).

Sorry to hijack thread but out of curiosity, what is your take on cf? Too stiff for fairings?
 
I have plastifix and tried it. To me it's not as strong and results vary depending what kind of break is it (I think it was invented for people who cannot weld plastic; It is expensive; if anyone wants you can have my barely used set for peanuts ....). As Les suggested, fix plastic with real plastic if you can. The only problem is that if you keep braking parts, it will get expensive (I don't care what people say). So you have to eventually learn how to do it. It's not really that difficult in my opinion. You just have to have a patience and bit of knowledge. Good tools make it only easier.
 
Back
Top Bottom