1964 Honda S90 | Page 2 | GTAMotorcycle.com

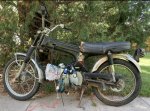
1964 Honda S90

Nice, looking for a battery side panel for my S90.

Nice. That is one part that I am missing as well, but it will probably have to wait for the very end. I'm going to have to find a 12v battery that will fit in there first ?

Is your S90 on the road? Or a project?
 
Pardon the crowded garage!

I got the roller together, for the most part (minus the fenders)
bkyh2GO.jpg


So this pretty much brings me back to the start point? A roller! But at least its pretty sound from where I'm standing.

Just to recap for the record, its now got new:
- Wheel bearings and seals, front & rear
- Tapered steering bearings
- Rims and tires
- Brake shoes
- Fork seals
- Rear shocks
- Mirrors and grips
- Headlight bucket
- Speedo
- Fuel petcock
And most importantly,
- Tank badges :cool:

I've decided to leave the tank as-is for now, a little rusty. Adds some character! And gives me an excuse to not paint it!
gQx8cfq.jpg


There are still a few issues right now -
1.) The front brake housing is buggered, I'll need a new one. Luckily it seems to be the same as the CT90, so one shouldn't be hard to get
h50YnDM.jpg


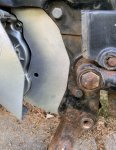
2.) Steering stop is buggered as well (someone must've had one hell of a crash on this thing). The tabs are present on the lower triple, but the stop on the head stock seems to be a bit short.

3.) The seat is tragic, the foam and leather are disintegrating, and there are no dampers under the seat pan anymore

4.) I need new rubber dampers for the tank (hoping to 3D print them)

5.) The rear shocks are a tad longer than stock, so the center stand is about half a centimetre too short. Going to have to try to add some material under the feet of the stand

Next up, I will have to fab the engine mounting adapter
sJvHoMT.jpg


And thats it for now. The bike gets to spend some quality time with its not-so-distant cousin.
gC2Svhg.jpg
 
S65’s came in a blue but was not a metallic. Nice project,why did you not go with the larger Lifans. Probably would have bolted in. DRATV for web site.
 
Tricky, I am so glad to have found your thread! I am working on a CL90 125 lifan swap and was just about to give up and swap it into my CT90. Do you think you could send me the files for the 3d print job, or the template for the mounts?
 
Tricky, what are your 2 stroke projects? I'm thinking about restoring an rd350.
 
Tricky, or anyone else interested..........I know a guy in the GTA with a Vapor Blaster.

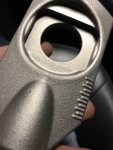
If you want to keep all those aluminum corroded bits nice and not coat or paint them (ie your hubs or an engine case or air cooled cylinders, forks, handle control perches ect.....) you can vapor blast them to get that oem finish back. Its like shot peening something but the shot is blasted with a slurry, so it's kind of like a wet sand so to speak. Even a decent shot peen is good for that kind of stuff......Ive attached a picture of a chain adjuster I did on my ducati 999 fresh out of a bead blaster. (not vapor blasting)

Perfect for restore projects like this.

Keep up the good work. I wish I had my own garage, God knows Id spend all my free time (and money) on projects like this.
 

Attachments

  • IMG_0506.jpg
    IMG_0506.jpg
    512.5 KB · Views: 14
Last edited:
S65’s came in a blue but was not a metallic. Nice project,why did you not go with the larger Lifans. Probably would have bolted in. DRATV for web site.

The Lifan and the Piranha have the same 2-bolt pattern. The Piranha I have is the 140, I believe the only bigger one is the Lifan 150 but I didn't want to be forced into using an oil cooler (though maybe I'll add one to the Piranha). Between the S90 and the CT90, DRATV has been very helpful!

Tricky, I am so glad to have found your thread! I am working on a CL90 125 lifan swap and was just about to give up and swap it into my CT90. Do you think you could send me the files for the 3d print job, or the template for the mounts?

Sorry for the late reply - the template I made up is up in my garage at the moment. Next time I'm there, I'll pick it up and get the dimensions posted here. Post up some pics of the CL90!!!

Tricky, what are your 2 stroke projects? I'm thinking about restoring an rd350.
A whole bunch of Yamaha DT400's :LOL: My descent into madness is documented in this thread. Right now, the first one is almost done. Just have a slight air leak at the decompression valve. I hope to have it running in the spring. Then I have a second frame ready to build, and then 2 other titled frames just in storage

The RD350 is a sweet bike from what I've gathered!! I've seen a few come and go on Kijiji, and always had to talk myself out of it. If you need advice, there are a few experienced members here at GTAM who helped me through some of the 2-stroke specific stuff for my DT400s, you will find them if you look through my DT400 thread. I can offer moral support and tell you what NOT to do!

Tricky, or anyone else interested..........I know a guy in the GTA with a Vapor Blaster.

If you want to keep all those aluminum corroded bits nice and not coat or paint them (ie your hubs or an engine case or air cooled cylinders, forks, handle control perches ect.....) you can vapor blast them to get that oem finish back. Its like shot peening something but the shot is blasted with a slurry, so it's kind of like a wet sand so to speak. Even a decent shot peen is good for that kind of stuff......Ive attached a picture of a chain adjuster I did on my ducati 999 fresh out of a bead blaster. (not vapor blasting)

Perfect for restore projects like this.

Keep up the good work. I wish I had my own garage, God knows Id spend all my free time (and money) on projects like this.

My GOD it's magnificent. I have long-obsessed about buying a compressor so I can start soda blasting, but that still needs a clear-coat. This looks great, too.

There are a lot of compromising I am making on this one, in terms of cosmetics. But I keep telling myself that when I have more time, money, and space, I'll go through it again and give it a proper full-bore makeover. When that happens, I'll come knockin for that info on vapor blasting!
 
The Lifan and the Piranha have the same 2-bolt pattern. The Piranha I have is the 140, I believe the only bigger one is the Lifan 150 but I didn't want to be forced into using an oil cooler (though maybe I'll add one to the Piranha). Between the S90 and the CT90, DRATV has been very helpful!


Sorry for the late reply - the template I made up is up in my garage at the moment. Next time I'm there, I'll pick it up and get the dimensions posted here. Post up some pics of the CL90!!!


A whole bunch of Yamaha DT400's :LOL: My descent into madness is documented in this thread. Right now, the first one is almost done. Just have a slight air leak at the decompression valve. I hope to have it running in the spring. Then I have a second frame ready to build, and then 2 other titled frames just in storage

The RD350 is a sweet bike from what I've gathered!! I've seen a few come and go on Kijiji, and always had to talk myself out of it. If you need advice, there are a few experienced members here at GTAM who helped me through some of the 2-stroke specific stuff for my DT400s, you will find them if you look through my DT400 thread. I can offer moral support and tell you what NOT to do!


My GOD it's magnificent. I have long-obsessed about buying a compressor so I can start soda blasting, but that still needs a clear-coat. This looks great, too.

There are a lot of compromising I am making on this one, in terms of cosmetics. But I keep telling myself that when I have more time, money, and space, I'll go through it again and give it a proper full-bore makeover. When that happens, I'll come knockin for that info on vapor blasting!
I just found this thread too, while working on my 1969 CL90. Your adapters give me hope. Since they are homemade, would it possible to lay they flat of top of some measure grid paper, or on a ruler, and/or next to some dimensional measurements. I’d like to upload them into my vinyl cutter software, and convert them to images that match the same size and shape of your adapters. As long as they are flat, and the camera is directly above them (so the image isn’t skewed at an angle), I can get digital version done in a couple hours or less.

This way I can print them on vinyl to make a sticker stencil. Lay that stencil on the steel and cut them out. I can upload the file on here, and mail anyone a stencil, who wants a stencil. You already did the hard R&D, if you don’t mind sharing your hard work, I don’t mind the 50cent stamp to mail people stencils.

Sorry it has taken me a while to upload the adapter plate. I know someone else asked for it as well. I can give you the profile in a PDF, GTAM won't let me upload a .dxf but if you need it, send me a PM with your email and I can send you whatever you need - DXF, or STL, whatever. You can use Inkscape to pull the profile and make your own DXF, too.

To anyone who uses this PDF - the drawing is on A4 paper size, if you print on letter size, verify the scale is correct after you've printed. Also, the hole positions are not going to be 100% on. Assume things will be a little bit out of alignment, I can't make any guarantees that this will be a drop-in fit for your bike. Maybe print it out and make a cardboard cutout version, double-check that it will work, maybe modify the hole positions, before making it out of metal. This was made using the Piranha 140, I am not sure if other engines such as Lifan are any different around that area. I know the mount holes are the same, but maybe the crankcases have a slightly different profile.

Remember -> first, I had to get the rear engine mount hole lined up with the original on the frame. This meant I had to grind away some of the frame. Also, I had to drill a new hole on the frame, south of the battery box (the third hole on the adapter plate). I did it in this location, as the steel was still doubled-up in that area on the inside of the frame. Also, this location didn't obscure the VIN

The two spacers (in orange for the 3D printed mockup) are approximately 93 mm in length (your mileage may vary, my frame may not be 100% true in those areas), and need an ~8.5 mm diameter hole for the engine mount bolts. I bought 3/4" round bar steel, which I will bore out. But there are many ways to skin that cat

If you have any questions, I'll be keeping an eye out in this thread, or you can PM me (y)
 

Attachments

  • AdapterPlate.pdf
    37.4 KB · Views: 28
Thanks for doing that! I’m gonna work on it when I get back home and see if I make it fit without grinding the frame and get some practice doing some cardboard aided drafting.
 
Thanks for doing that! I’m gonna work on it when I get back home and see if I make it fit without grinding the frame and get some practice doing some cardboard aided drafting.

Sounds good! Keep us posted. If you can find a way of doing it without removing material from the frame, that would be fantastic!

Edit: I was thinking at one point of trying to make an adapter cradle for the entire engine, front & rear so that it would be a drop-in replacement. But I gave up, maybe prematurely. I think the engine would sit a bit lower and farther forward to avoid collisions with the frame, because the crankcase is a different shape than the original. Something to consider
 
The bracket didn’t work for my cl90. I couldn’t get a second hole to line up. Lucky for me my friend has a cnc router and made me some plates based off pictureS off my paper cut out with a ruler next to them. Now I haveTo figure out where I missed up the wiring because I keep blowing fuses.
 

Attachments

  • EC44EF38-B3C9-457F-9593-4D0A7A6F6B4F.jpeg
    EC44EF38-B3C9-457F-9593-4D0A7A6F6B4F.jpeg
    676.2 KB · Views: 11
  • 465F75B6-3BF3-4173-8FDB-F579DC3D0D0F.jpeg
    465F75B6-3BF3-4173-8FDB-F579DC3D0D0F.jpeg
    831 KB · Views: 10
The bracket didn’t work for my cl90. I couldn’t get a second hole to line up. Lucky for me my friend has a cnc router and made me some plates based off pictureS off my paper cut out with a ruler next to them. Now I haveTo figure out where I missed up the wiring because I keep blowing fuses.

Awesome!! That's a great solution

My friend and I have some experience with the wiring on these, because we have a Lifan in the CT90 as well. If you have any questions, I can try to help out. We went full 12V though - are you trying to keep the bike at 6V?
 
Help would be awesome! My brother gave me a harness that matches pretty perfect. I am going with 12v. I dunno if the harness/electrical components are 12 or 6v.

I disconnected the battery today, and replaced the blown fuse. Covered the carb (no exhaust) and can get it to run for a few seconds, if i keep the kick lever down after kicking.

If I have the battery hooked up and use the electric start. itll start and run until the fuse is blown.

This is how I have the engine hooked to the harness:
Engine-Harness
Blu/White-Blu/White
b/r-b/r
y-w
y-y

Im not sure if i have the starter connected correctly though. there's a big green (ground) lead from the starter thats bolted to the body, do i run that to the battery ground or ground it to the frame again? I have the starter positive and the battery positive connected to the starter solenoid.

I do have some confusion at the handle bar controls. There are tons of wires coming from the harness, I matched the honda spree kill switch and electric start the best I could to the harness. There are some black wires, i dont really know where to connect them to. There are blade and bullet connectors from the harness.

EDIT: Does one of the yellows from the engine magneto have to grounded!? Is that whats causing my fuse blowing and improper running?

EDIT2: Grounded one yellow and fires first kick! now i need to get more fuses and try to rewire the kill switch and starter motor to see if i can get that fuse from blowing.


Tricky, where are you hiding all your electronics? I think i need a new smaller battery. I have no idea where i am going to stuff all the electronics and battery in a clean manner.
 
Last edited:
EDIT2: Grounded one yellow and fires first kick! now i need to get more fuses and try to rewire the kill switch and starter motor to see if i can get that fuse from blowing.


Tricky, where are you hiding all your electronics? I think i need a new smaller battery. I have no idea where i am going to stuff all the electronics and battery in a clean manner.

Hey loon, sorry I missed this post! Glad to see that you got it running at least!
 
It's been a long time, but I finally got the engine mount adapter cradle done thanks to some help

ylehHOK.jpg


Here is how it sits on the engine (test fitting before putting it in the frame)
V7mmMIq.jpg


And the engine is now mounted. I will have to remove it again soon, to get paint on to the cradle adapter to keep it from rusting
qILS5Sh.jpg


So one step forward today!! Next up, is trying to figure out how to get an exhaust on this thing. The stock exhaust system is in crap condition, and it will not bolt up to the Piranha anyway.

I do have a repro CT70 exhaust that I got from PCC motor along with the Lifan 125 that is in my CT90. It is just collecting dust in the garage, and it does bolt up to the Piranha......
JNnMzFq.jpg


I'm not a huge fan of that CT70 heat shield, but I don't think I'm super mad at how it looks. And the exhaust is free and useless to me otherwise, so I might try to make it work. The only issue is the rear mount doesn't quite clear the shock, so I'll have to change the shape a bit so I can rotate the exhaust in towards the bike a bit more, and find a way of fixing that rear exhaust mount to the frame or shock mount

cUqVg5Z.jpg
 
I just found this thread.
My dad bought a brand new 1964 Honda 90 for himself as a 30th birthday gift.
I vaguely remember it but I do know it was black and looked like what you are building. For all we know, yours may have been his old bike! I have no surviving pictures of this bike.
It was the bike he rode me around on starting in 1967 when I was 6 and that got me hooked!

He later upgraded to a 1970 CB100 which was a far more modern design at the time. I have pics of this bike.
 
Last edited:
I like the look of the ct heat sheild ! - suits the bike and is in great shape.

Yes, it has officially grown on me! I like the exhaust higher up than stock too :cool:

I just found this thread.
My dad bought a brand new 1964 Honda 90 for himself as a 30th birthday gift.
I vaguely remember it but I do know it was black and looked like what you are building. For all we know, yours may have been his old bike! I have no surviving pictures of this bike.
It was the bike he rode me around on starting in 1967 when I was 6 and that got me hooked!

He later upgraded to a 1970 CB100 which was a far more modern design at the time. I have pics of this bike.

Very cool!! I would love to see the pics of the CB100 if you want to share.

When I get into these projects, I do try to be mindful of the history. This one was in pretty bad shape when I came across it unfortunately. But it's in a good home and will get many years of use going forward :)
 

Back
Top Bottom