More trailer talk | GTAMotorcycle.com

More trailer talk

cknowles

Well-known member
More trailer talk and construction blog

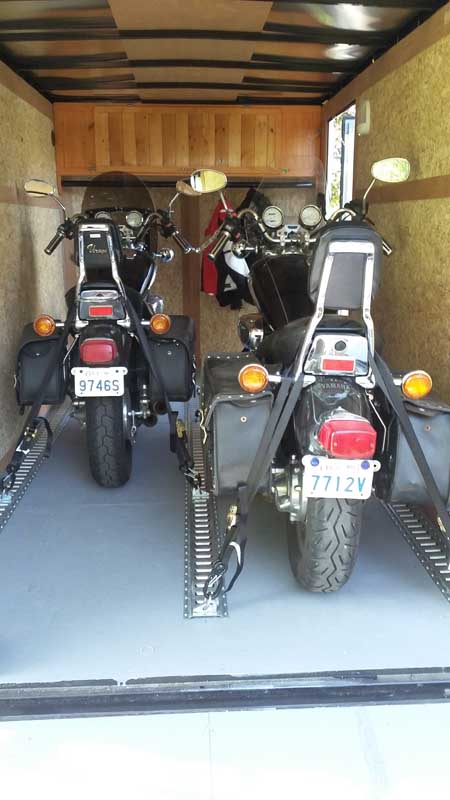
I've enjoyed reading everyone's trailer stories here and thought I might as well chime in with mine. My wife and I have matching Virago 1100s and like to take them with us on vacation.

We bought a small folding trailer (Chinese Kendon clone) because I didn't like the rental prospects. And, while it was structurally sound, I found the electrical was a complete mess and no lights worked.

As you can see it was a little dirty and had some rust.

1.JPG


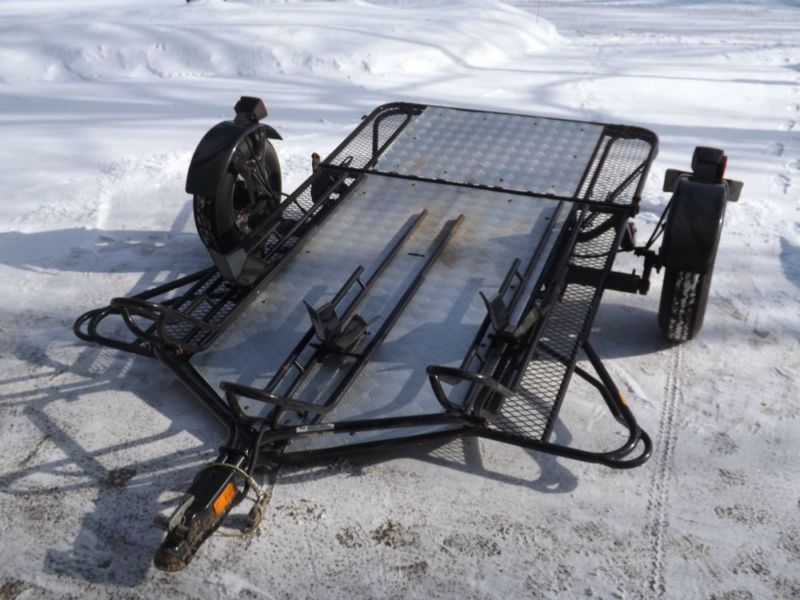
The advantage for us was that it stored nicely in the garage

5.jpg


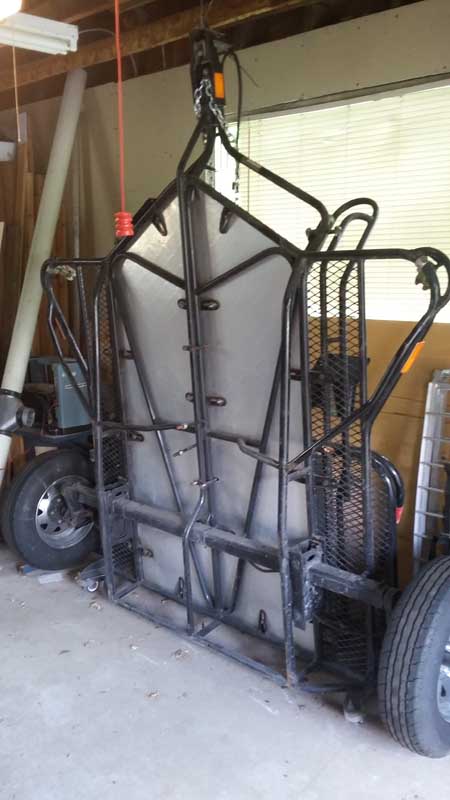
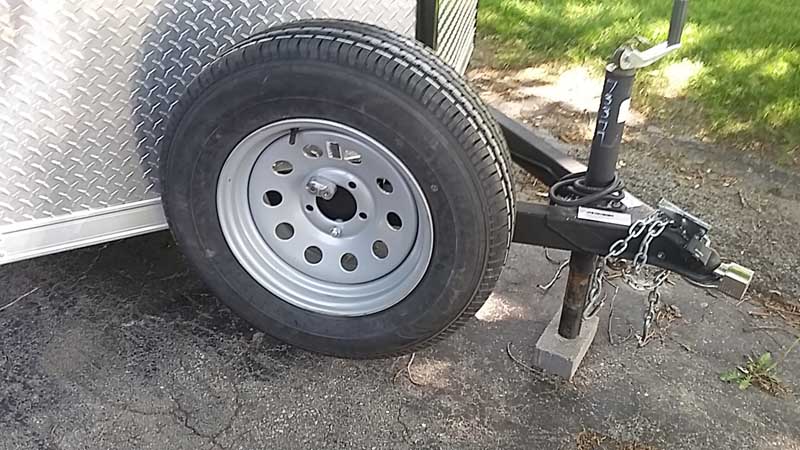
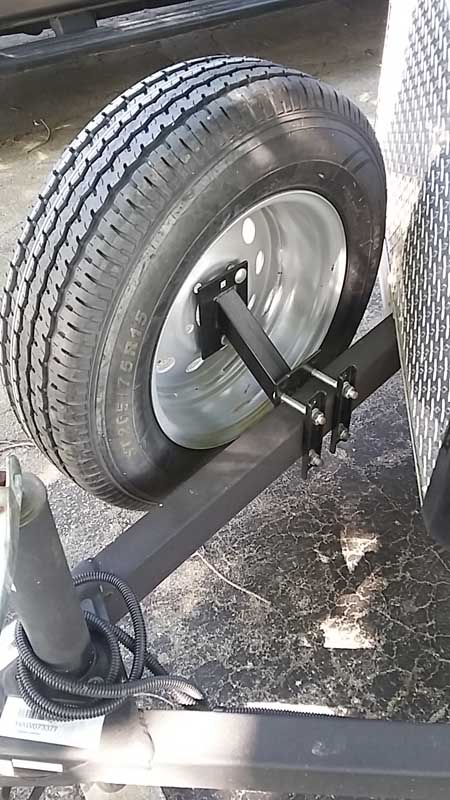
I replaced the entire wiring harness and found 13 splices in 12 feet of wire! The owner said he had maintained the wheel bearings properly, however upon inspection there was barely any grease in them and the races were rusty! So new hubs and bearings were installed. Checking the date codes on the tires I found them to be 9 years old, so they got swapped out for new rubber.

3.jpg


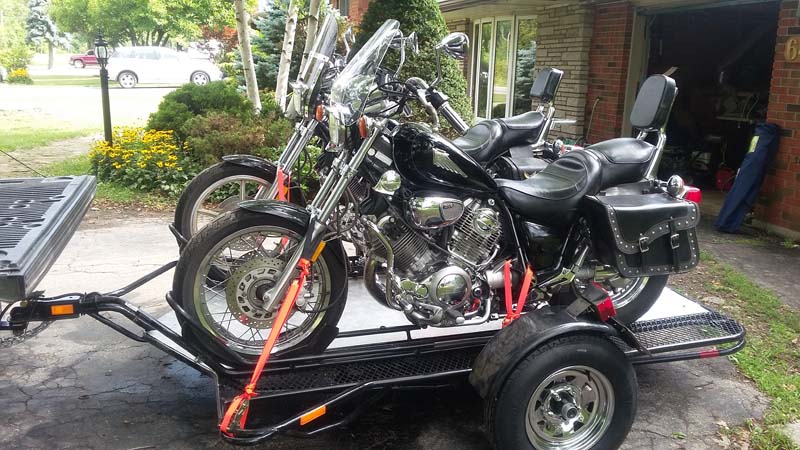
I bought proper tie downs and safety chains, it came with a single braided cable for brakeaway protection.

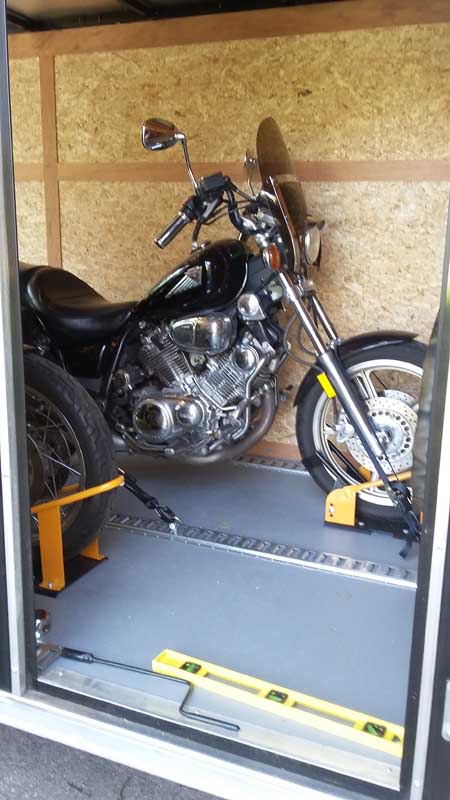
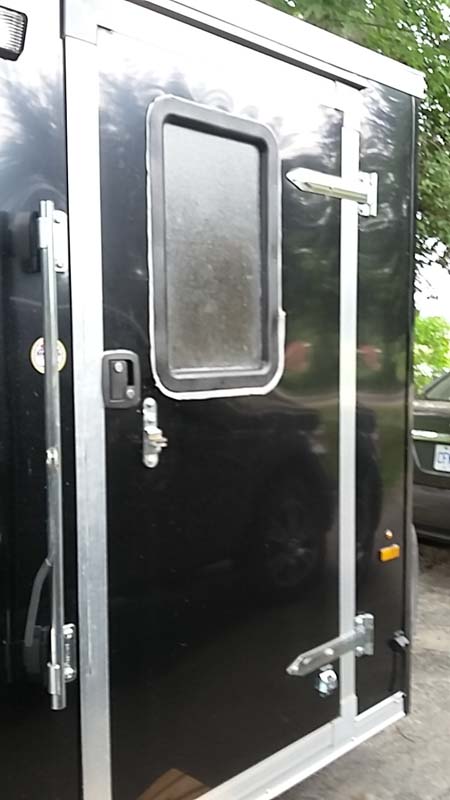
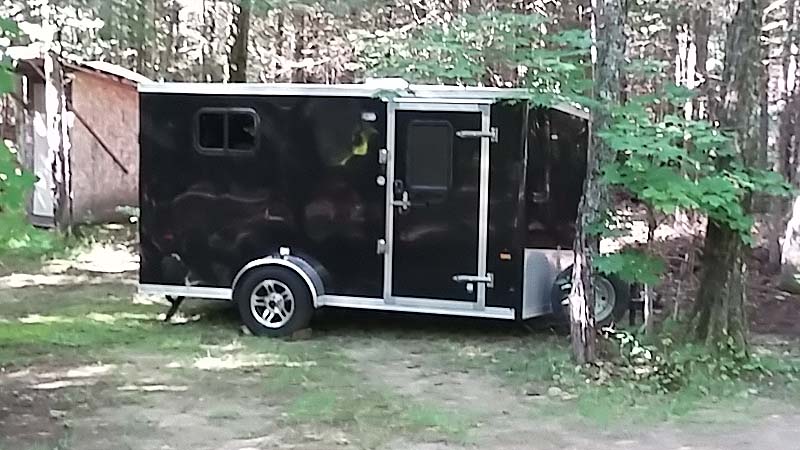
This trailer was not designed to ride the bikes on, so they needed to be pushed into place and this is really a two person job..

6.jpg


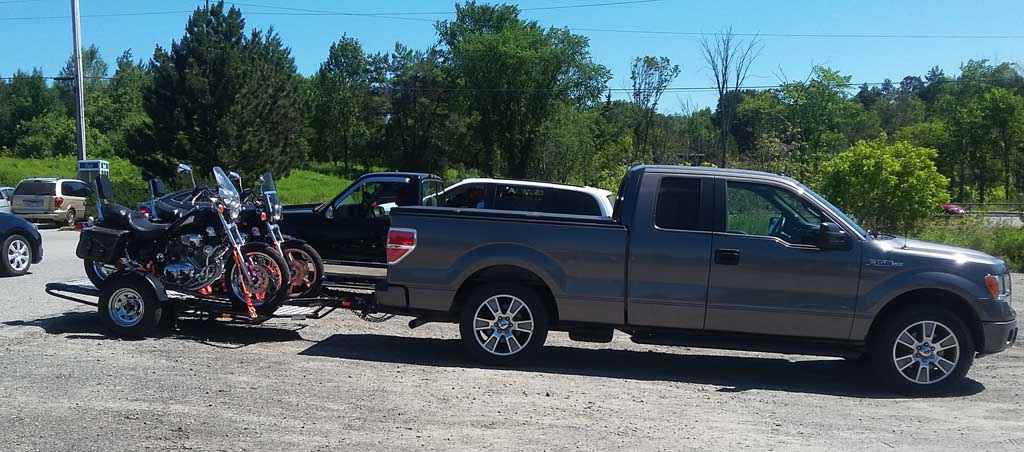
This served us well until our third season when my wife put her back out while we were on vacation, and I had to load the bikes onto the trailer myself.

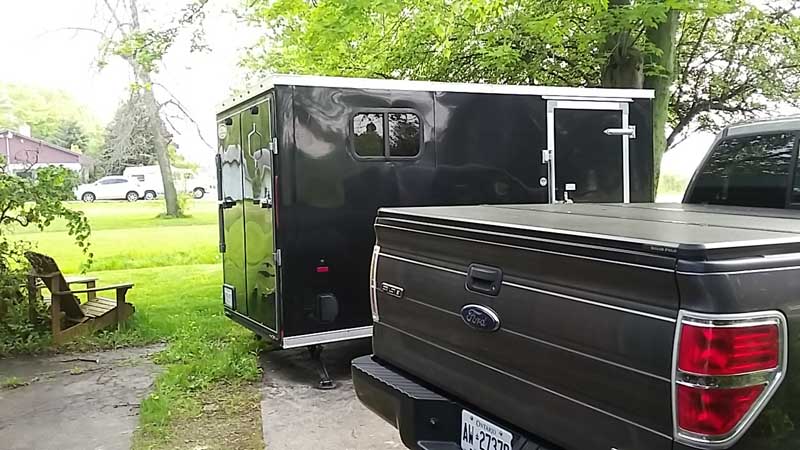
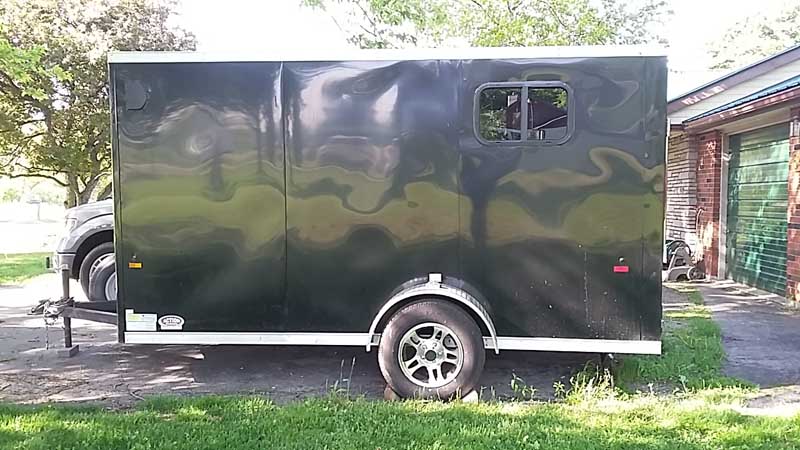
Though I was able to get the bikes loaded, I injured myself in the process and once we got home it was time to consider an upgrade.
 
Last edited:
I found a gently used enclosed 6x12 trailer a short drive away, and sold my faithful folding trailer to another couple who needed one for their trip to BC.

7.jpg


This trailer was a blank canvas, and I have some cool ideas. Building on a tight budget means that everything I need either has to be made, scrounged, repurposed, or come on a ridiculously low sale price.

8.jpg


9.jpg
 
Surfing the local online adds I found someone selling these stabilizing jacks. I cleaned, painted, and lubricated them to get them working properly, then installed at the rear to stabilize the trailer during loading and unloading.

10.jpg


Verduyn tarps in Hamilton sells "E" track at a fraction of even Princess Auto's price, and it comes in 10' strips. However they are a bit more, shall we say, industrial. They needed cleaning and de-oiling, as well I took a grinder along the edges to make them safe in case bare skin should come into contact with them.

Next my daughter helped in painting the floor and ramp to protect the particle board, she also helped me install the "E" track and the "Maxxhaul" wheel chocks from Amazon..

12.jpg


I added Aluminum "C" channel around the ramp extension as it was already showing some wear.

11.jpg


This was as far as I was able to get before my scheduled surgery in October.
 
Last edited:
Once I was fully recovered, I started again and built a storage cupboard across the front, this is spacious enough to hold our helmets and riding gear. The curtain rod is made from a fence post and is sturdy enough for all of our jackets and riding pants etc. I modified the coat hangers so that they won't fall off when going over bumps.

13.jpg


14.jpg


Both bikes fit comfortably into the little trailer.

15.jpg


It's still easy to access the front of the trailer with the bikes loaded

16.jpg


Finally a mount for the spare tire from Princess auto.

17.jpg


18.jpg
 
I found an unused Fantastic fan for sale privately, and conscripted my son to help install it.
Inside, I built a subframe to attach to the roof to give something to support the fan and to anchor the screws into.
On the outside we built a gantry which spanned the top of the trailer and supported him so that he would not be directly on the thin aluminum roof.

19.jpg
 
Last edited:
I like that enclosed trailer, sweet

the wheel chocks, how did you attach them?
how thick is the particle board floor?
 
The next step was to add some power and windows so that we had the basics of light and ventilation. This shore power adapter takes a standard 15 amp extension cord, however the plastic cover doesn't stay closed in cold weather, so a replacement is on order.

26.jpg


Amazon deals store came through with a WFCO power converter (ridiculous deal!) Inside I built a framework to house the power converter and to provide a convenient 120 v power outlet along with some 12v charging accessory ports. I ran wiring to the places where lights were to be installed, 2 in the ceiling, and the interior light beside the entry door, and a porch light outside.

27.jpg


28.jpg


Next the ceiling was insulated and panels attached to the roof beams. Then the lights were finally
installed for good and we had light!


29.jpg

30.jpg
 
I found a wholesale shop outside Brantford that sells used windows and was able to get two suitable windows and some paneling.

To install the windows I first made a frame which matched the window dimensions


20.jpg


then removed the interior panels to reveal the ribs which needed to be cut. In this photo you can see that I did not remove the aluminum
trim piece a the back of the wall (this would come back to haunt me later).

21.jpg


I cut the rib to allow the frame to fit in, then used the frame as a template to cut the outer skin.

22.jpg


The windows were wrapped in butyl tape and installed without any drama.

23.jpg


24.jpg


25.jpg


The crossflow from both windows and the roof vent all contribute to make it quite comfortable inside.
 
I wanted a way to be able to secure the entry door from inside, so I bought a replacement RV style door handle.

These are normally installed during door assembly and I couldn't take the door apart so, carefully cut holes and drilled and filed until everything lined up perfectly. I had to pad the handle a bit as it was made for a 1 1/2" thick door and this one is only 1".

31.jpg


32.jpg
 
My plan is for us to be able to camp with this trailer so in researching small toy hauler campers I found an elegant design for folding beds. Basically I started with a simple ladder frame which I then skinned with the same material as the ceiling of the trailer.

35.jpg


36.jpg


I added Piano hinges, and mounted it to the wall.

I didn't trust the screws into the wafer board to solely hold the weight so added support cleats which are screwed into the wall studs. On the bottom the vertical supports have screw heads which drop into recesses in the floor. This makes the whole system quite stable.

37.jpg


38.jpg


When folded away they take up barely any space at all.

39.jpg
 
I wanted to put a window in the front door, and found someone selling a damaged trailer door complete
with window. So I carefully removed the frame and glass from the door, cleaned it all up and painted the
frame black.

To install into the door, I first made some exploratory holes to see where the internal bracing
was, then cut the interior panel using a cardboard template as a guide. I added vertical supports to
each side of the opening and made 2 radius blocks for the bottom corners.

40.jpg


I then drilled holes through to the outside. Now I was committed as the rain clouds were starting to form to the west!

41.jpg


Again the window was designed for a thicker door, so I furred it out with a frame cut to size.
I think it looks pretty attractive if I do say so myself.

42.jpg


I got the window installed just in time, but did not have even time to trim the butyl squeeze out before the heavens opened.


43.jpg
 
At this point we were ready to take it on it's first long trip to a cottage we had rented near Kearney. I hooked the trailer to my truck, and started checking my lights. Hmm, driver's side signals were not working. Ok, well the original wiring connector at the front didn't look that good, so I replaced it and everything seemed good to go.

We had noticed several accidents on hwy 400, and since we were on vacation and not in any hurry, decided to take back roads up. We stopped just outside of Bolton to get a bite to eat. And when I checked my lights the trailer was completely dark. I found that there was now no power at the trailer connector on the truck. I was only a couple of minutes from "Fines Ford" in Bolton and they were able to get me up and running in short order (pun intended). There must be something wrong in the trailer wiring.

Well, we took our time and stayed off main roads as much as possible, but ended up blowing 2 more fuses before making it to our destination.

45.jpg


Once we were settled in I decided I may as well tear into the trailer and see where the problem was.
Upon removing the aluminum panel on the left side (recall I had not removed that during construction)

46.jpg


I found that the power wire for the left side lights had fallen between the panels and got abraded down to
bare wires. Well at least I could fix this!

44.jpg
 
Last edited:
Back home from vacation and I can now start on making a folding table to double as a bed support. I'm recycling parts of an old IKEA bunk bed here.

47.jpg


That's all for now, but in future updates I'll be making cushions and a portable camping kitchen
 
I like that enclosed trailer, sweet

the wheel chocks, how did you attach them?
how thick is the particle board floor?

The chocks are bolted through the floor and backed up with huge washers.
It's a 3/4" floor. The chocks are only there for support, and the straps and E track do all the work holding the bikes in place
 
Really nice set up. I don't love the idea of windows for theft concerns but I do sleep in my Sprinter when I race mx so I know the struggle with a lack of air flow in the summer. I would tint those windows to keep curious eyes from seeing you have motorcycles inside. Hope you have a good season travelling around with it.
 
The chocks are bolted through the floor and backed up with huge washers.
It's a 3/4" floor. The chocks are only there for support, and the straps and E track do all the work holding the bikes in place

cool, thanks for the reply
nice trailer !
 
Really nice set up. I don't love the idea of windows for theft concerns but I do sleep in my Sprinter when I race mx so I know the struggle with a lack of air flow in the summer. I would tint those windows to keep curious eyes from seeing you have motorcycles inside. Hope you have a good season travelling around with it.

Thanks!
It doesn't show well in the pics, but the windows are well tinted so that it's hard to see inside.

48.jpg
 
Last edited:
If anyone is looking for a good deal on a single stinger folding trailer, this one is pretty good.
I don't know the seller, found it on Facebook. $950 negotiable is pretty good and these things are awesome if you have no space for a trailer.

Sent from my SM-A530W using Tapatalk
 
You score an A plus for scrounging up solid deals , and that's some practical re engineering in there. Very nicely done.
 
Crazy setup on the trailer! Real nice! ...how long did all of this take you?

** Would have taken me 2 years * :p
 

Back
Top Bottom