1978 CB550K Restomod | Page 8 | GTAMotorcycle.com

1978 CB550K Restomod

Just a quick update. I have ran into problems bleeding my front brake. (if you have trouble bleeding the rear, your problems are bigger than you think, haha ;))

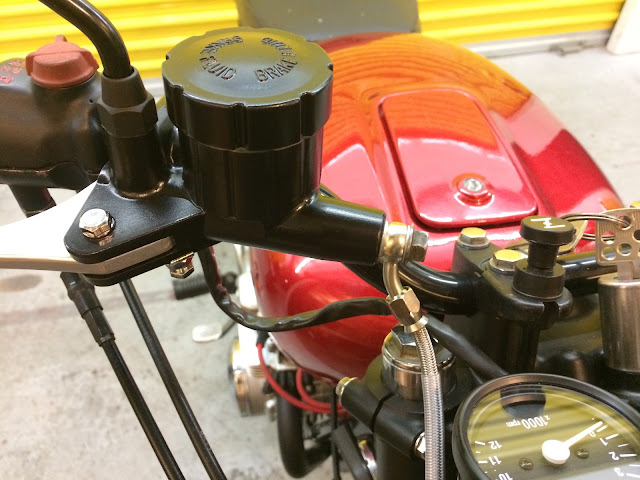
Anyway, the MC was not allowing fluid into the lines. The MC was professionally rebuilt, but I think that the rebuild kit was not the correct one, because the little tiny hole in the reservoir was blocked by metal. So, there was no fluid getting into the piston area, and hence I was not able to bleed the brakes.

In an effort to ride the damn thing, I just broke down and bought a new MC assembly from Sirius Consolidated so that I can just get on with it. Should be here by the weekend so I can give it another try. Once I get the brakes bled, I will confirm what the problem was on the OE MC, but I am almost certain the rebuild kit was incorrect. Oh well, **** happens, minor setback.

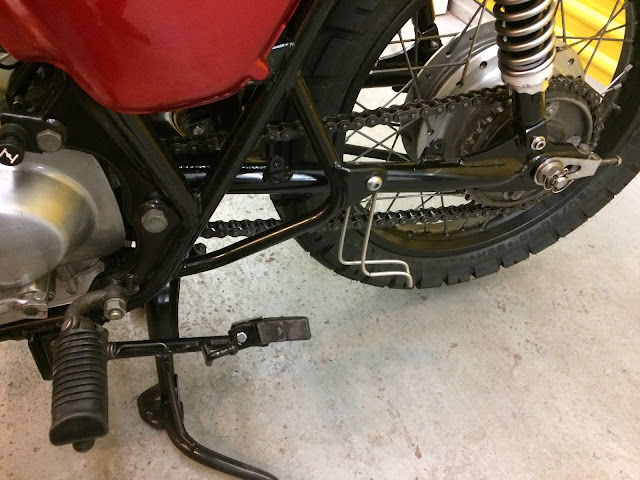
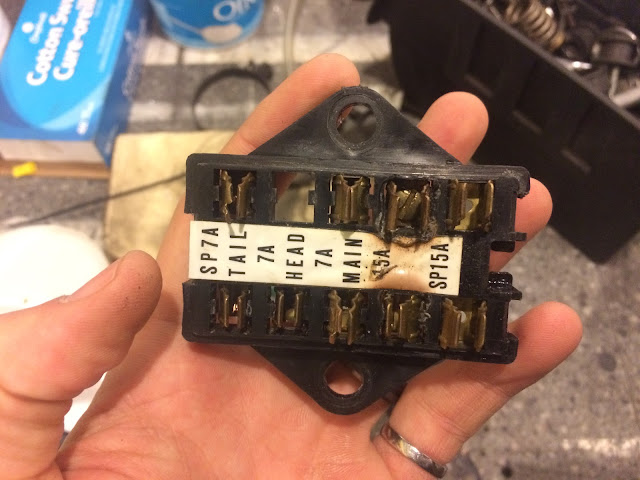
Other than that, the only outstanding items are to loctite all the front end parts and put the chain on. And maybe fix carb #2, which I think has a stuck float. All the electrical is done, and other than the float thing, runs great.

Should be on the road in a week or so. famous last words.
 
So, the build is wrapping up right now, and it's just down to the little things. I have been slowly checking them off the list, but it's not a glamorous process, so there aren't many pictures to take of it.


Here is the list:


  • Loctite bolts (mainly front end stuff, but also misc bolts around the bike)
  • Fix horn (horn inop)
  • Fix tail light issue (brake light ok, tail/plate light inop)
  • Bleed brakes
  • Build center stand stop
  • Build airbox lid
  • Build engine crash guards

The brakes issue was the smallest, but turned out to be the largest. We will start there.


I had the MC and caliper rebuilt by Midwest Caliper here in Toronto. Because of the stage of the build and when I sent out the MC and caliper, they sat in a box for a few months after I got them back. NBD, other than it makes it harder to go back and get issues rectified once I find out that it doesn't work. Oh well, live and learn. The brakes were the only thing that I didn't do myself, so that's a teachable moment for me. I'll just do it myself next time.


I sent out the MC and caliper to be both cleaned and rebuilt. My problems started when I wasn't able to build pressure in the system when I installed the new EBC Sintered pads and SS braided line (pads from FSMotorcycle, custom SS brake line from Pro6 Cycle). There was no fluid coming down to the caliper.

I took the caliper apart and found out why (I think). The rebuild kit for this MC has to be incorrect, because the smaller of the two holes in the reservoir was blocked by a piece of metal. Not just a flake or something, but it looked like the features on the new piston that was installed was not correct for the model of MC. This caused fluid to not be able to enter in front of the piston, and thus the MC could not send fluid down the lines. It was not possible to vacuum-bleed it either, I tried that as well.

blogger-image--483511192.jpg


blogger-image-1073971315.jpg


blogger-image--2105822764.jpg


Instead of further faffing around, I just bit the bullet and ordered a new MC/lever assembly from siriusconinc.com. I ordered on sunday night, and it was delivered to my house tuesday afternoon. Damn. Worth it.

blogger-image--1285651122.jpg


blogger-image--811468194.jpg


Once I got it bled with the new MC, all was well. I even took it for a rip through the halls of the storage unit late at night. Everything works great, and more importantly sounds great.
Then, through no fault of anyone's (except mine) I pulled a rookie move when I noticed a tiny drip of fluid leaking from the caliper banjo. I dusted off the ol' 200lb gorilla wrench and proceeded to over-tighten the banjo, and in the process strip the threads on the caliper. FACK. Who let's these rookie ******** grab a wrench anyway? So yeah, total noob mistake, and because I don't want to put a helicoil in a brake line, I've already ordered a new caliper (again from siriusconinc) which should be able to be installed tonight. I will update tonight when I get it all squared away. I fully expect the saga to continue.

blogger-image--1261989267.jpg


Here is the airbox lid I threw together. It is just stainless sheet metal with some lips and tabs to prevent stray water from getting into the airbox. I also used an old airbox to carb boot as the intake trumpet.

I also bought a new AGM battery (stock size) and made a new battery strap for it, since the strap, airbox lid and chain guard are all pieces that did not come with the original bike. Oh well. It's all the little things that get ya in the end.

blogger-image-568126222.jpg


I picked up an OE style chain for it as well. When I put it on, I realized that the leg of the center stand was coming in contact with the chain when I put it up. Turns out that the OE pipes have a little rubber snubber on them that stops the stand from hitting the chain. No stock pipes on it equals stand hitting the chain, so I had to fabricobble a solution together. I used SS wire (or is it round bar when its this big?)

blogger-image-867517684.jpg


blogger-image-525605698.jpg


It looks a little awkward here with the center stand down, but the alternative was to put the bracket on the other side and run it off the exhaust. I may do that at a later date, but for now I will just run it like this. It looks nice when the center stand it up though.

blogger-image-1299397316.jpg


The saga will continue after tonight when I get back at 'er. I will update the electrical stuff, and start on the crash guards.

 
Like the red matching hand grips. Nice touch!
 
Got the replacement caliper (and a few banjo bolts) to finish off the braking system. Super nice, and quick delivery too. Can't complain.

blogger-image-1996130667.jpg


blogger-image-1800156998.jpg


I also rewired the fuse box so that it wouldn't be all melty and stuff. The PO rewired it (I don't think this is the original fuse box, and if it is, it has been rewired because the brown and black circuits (tail light and head light, respectively) had been combined, and the tabs for the main circuit has been 'revised'. Super janky. So, I put some inline fuses and new miniATC blade style fuses in a new fuse box. Hopefully it prevents some unplanned melting later on. This fix also sorted out the tail light issue that I was having, which was when the bike is on, the tail light/licence light was not illuminated, but the brake light worked. Once again, it was because the PO ****** with the wires then hid it all.

blogger-image--439120299.jpg


Mmmm, extra crispy

blogger-image--1168743185.jpg


blogger-image-318526970.jpg


blogger-image--314909742.jpg


New caliper is on, braided line is all set up, the whole front end is loctited, and the front brake is bled. Next up I need to take it for a quick spin around the block.

blogger-image--1800693263.jpg


blogger-image--1391844108.jpg


What a nice sight, being able to see everything crossed off. I would call this officially done, though tonight I do need to stick the badges on the tank and side covers, and build some crash guards. Those I consider optional to the build though because they can be done concurrently while I ride the bike.

blogger-image-591783960.jpg


I also fixed the horn issue. The button was not grounding to the switch case, and because I used black handle bars with powder coating on them, the case was not making a positive ground to the bike. Once again, the PO also tried to fix this issue by hacking up the harness and running new power and ground leads to the horn from a separate (and stand alone) button, so I sorted all this out as well. It is now running off the stock button again as well. Its not perfect, but it is better than it was, so I will run it like this.
 
I wanted to add a bit of crash protection to the bike, but I didnt want to add anything too big to visually affect the profile of the bike and engine. I tried to find some of those 3 bar crash bars that just fit around the stator and points covers, but I couldn't find any in the local salvage yards.


I was just about to buy a tubing bender and build them myself when my neighbour caught me on the street and said that he found a pair in his shed. They were not for a CB550, but they had the profile that I wanted.


I would need to build new mounting tabs to fit the CB, and probably couldn't keep the chrome finish, but that's okay. Chrome is no bueno anyway. At least this way I could make sure that the bars are set tight to the engine cases so they don't stick out too much.


Here is the idea:
blogger-image-832345564.jpg


blogger-image--345456871.jpg


blogger-image-504871313.jpg


blogger-image--1570950032.jpg


The tabs were somewhat straight forward, but had to be test fit many times because of how close the bolt bosses were to the engine cases. Especially the left side under the stator cover.

blogger-image--1901332084.jpg


After smoothing all the welds down, I was left with this.

blogger-image--1296359985.jpg


blogger-image-1510105982.jpg


blogger-image-958476126.jpg


blogger-image--1956421577.jpg


blogger-image-602915362.jpg


I am happy with how closely they fit to the engine.

blogger-image--1656692867.jpg
 
My ****** FCAW box (its not even mine....) does not make the best looking welds, so to have something look nice requires a flap disc to smooth out the welds and usually bondo and paint to blend them in. So, since these bars will be painted satin black like the rest of the bike parts, bondo and paint is what is happening now.
blogger-image--1018736316.jpg


blogger-image-1250642397.jpg


blogger-image--421343239.jpg


blogger-image--8438725.jpg


I have found that self-etching primer is a very good primer to use on chrome. I am very happy with all the painted parts on the bike, and the tins were primed over roughed up chrome. This is what I did here as well.

blogger-image-419377169.jpg


blogger-image--1179033239.jpg


blogger-image-1058977922.jpg


blogger-image--319421488.jpg


Here is what the final crash bars look like when they are painted and installed on the bike. I am happy with how they blend and disappear into the bike as a whole. Minimum clearance is about 1/4", so they are tight to the cases, which is what I was going for.

blogger-image-2034551166.jpg


blogger-image--1586270313.jpg


blogger-image--1108561367.jpg


blogger-image--1550521815.jpg


blogger-image-1836628578.jpg


blogger-image-1780134025.jpg


blogger-image-1221857459.jpg


And with that, the bike is complete. It is already insured, and I intend to ride it as soon as I get a plate and sticker for it (so hopefully this weekend).

Done and done. I am really happy with the way it turned out.


Also, it may be for sale in the near future depending on whether my wife wants it or not.
 
@thirstforspeed I think you did a fantastic job on this bike. Custom, yet to me, still retains the classic look of the bike. I really enjoyed following along on this journey and look forward to the next one!

Sent from my custom purple Joe Bass mobile device using Tapatalk
 
Awesome job, definitely something to be proud of.
Keep your eyes open for a velocity stack with the proper shape. It is amazing how much better the flow is with a properly shaped stack.
 
*claps*

Really impressive work. Makes me want a welder, and a bigger storage unit w/ power.
 
Nice! Looks sweet.
Fine work. I predict your wife will like it or not, depending on if it's loud.
So hopefully it will be quiet.
Or not - hey maybe you'd really rather sell it, heheh...
It's calling out to me for some black handgrips - but otherwise 'perfect'!
(And your timing is even pretty good too.)

Traditionally riding one of these things, it's a small but porky sort of bike, very smooth, but gutless.
It'll perk up at 6-7+ grand though, and make good progress if you keep the revs up.
Hence the noise comment. It should 'feel' much quicker if it's quiet...

Thanks for documenting the build on GTAM.
Please keep us updated with your experiences riding it!
 
Agree on the black handgrips. Or maybe gray or brown.

Love those Shinko tires, I may end up getting the same for my ZX6D.
 
Bike looks great....makes me regret getting rid of mine!!!

If you end up keeping it and actually riding it, I would suggest adding another caliper/rotor.
I did this mod and it made a huge difference.
 
Bike looks great dude! Did you manage to make the bike idle with the custom exhaust? Or is the exhaust made for the cb550 stock carb set up
 
thanks guys! it was a fun resto. hopefully i can do one project a year, and i'd love to do another one. the other thing i want to do is make a SuMo out of a CBR250R. I figure that if i can get my hands on a wrecked one (since i wont need the plastics or tank or anything) i could strip it right down, build some crash bars and a new tank, and make it a SuMo that i could ride in the winter. so once I know if this bike is being sold or not, i am gonna get on the hunt for a rough CBR250R.... in a perfect world it would work...

my wife wanted the bike to be loud. its pretty loud with the butterfly open. It quiets down a bit when the butterfly closed, though that was never intended to be run like that on the street, its only to quiet it down as its warming up in the driveway so the neighbours don't hate us too much.

my wife rides a GS450GA (2-sp automatic) right now, so she will notice a hell of an improvement, even though in ultimate terms its not the fastest thing around.

The bike idles alright. there is a 6" baffle in there where the 4 header pipes merge, so its probably similar to a stock 4 into 1 in terms of backpressure. The carbs have not been jetted, so i wanted to make it as close to stock as i could.

I am still not 100% sold on the red grips. I originally wanted a white tank, and the red grips would've been super sexy with white tins, but they aren't doing it for me with the red tank, so I think I might change them once I get some miles in them. Also, they are impossible to keep clean. dirt really shows on the red grips (shocking, i know). I think they will be changed soon.
 

Back
Top Bottom