1978 CB550K Restomod | Page 3 | GTAMotorcycle.com

1978 CB550K Restomod

Simple Green plus toothbrush = achey fingers after 3 hrs. At least the wheels are clean though.

blogger-image-2116767547.jpg


blogger-image-1974781305.jpg


blogger-image-1340790775.jpg


blogger-image--890120084.jpg


blogger-image-788184919.jpg


blogger-image--559000050.jpg


blogger-image--1076019751.jpg
 
Just wanted to hit the engine with some touch up spray so that the cases are a uniform colour. The grime that was on it had caused the bottom of the cases to yellow in spots, and there were some spots where the coating came off. To make it all uniform, I figured that it would be best to hit everything with some paint. The case covers were masked because I want to polish them.

blogger-image--825551961.jpg


Now I 'bake' it in my 'oven', which is just a space heater inside a box made of heavy plastic sheet and 2x4's. But it can get the temps up to 100*F, which is a hell of a lot better than 55*F that it can get down to in the shop right now.

blogger-image--822671547.jpg


blogger-image--1655844609.jpg
 
I needed to clean and paint a few more things. The battery tray gets a shot of appliance epoxy, and the forks and top triple gets to go black and never go back.

blogger-image-747791070.jpg


blogger-image--1690052524.jpg


I got down and dirty with the emery cloth to clean up all the surfaces on the top triple and the fork legs. Mmmmm, purdy.

blogger-image-733241696.jpg


blogger-image-64440448.jpg


blogger-image--484296628.jpg


Damn, that satin black looks great. It really pays off to sand the aluminum before the paint goes on. The surface finish is soooo uniform. Awesome.

blogger-image-167656162.jpg


blogger-image-451177337.jpg


Here is a list of all the stuff I want to do to this bike, both short term to make it a rolling chassis, and longer term (+1month or so) to finish the restomodding. Lots of little things are crossed off, but lots of actual work remains. I want this to be a rolling chassis in 1 month.

blogger-image--1087567087.jpg
 
I wanted to re-use the OE hand controls for this bike, because they are still in great mechanical shape, and because they are metal. New hand controls are going to be plastic, and would require a re-wire of the plugs. And I can't afford the nice re-pops of OEM stuff.


I needed to disassemble, clean and degrease, paint and re-grease, then reassemble them. There was a surprising amount of grime and old grease in these. I guess 40 years will do that.

blogger-image-881702876.jpg


blogger-image--1424282795.jpg


blogger-image--1501866374.jpg


blogger-image--532433073.jpg


I chose satin black as the colour for the cases. Red for the letters. All the mechanical switches inside the controls were refreshed. They got a deep clean in SimpleGreen Pro HD, and then new grease before they were reassembled. They now have a nice solid and positive action. Very close to stock (I imagine).

blogger-image-193802102.jpg


blogger-image--1872127910.jpg


blogger-image--505058628.jpg


blogger-image--1454024685.jpg


blogger-image--1658671194.jpg


blogger-image--849424800.jpg

 
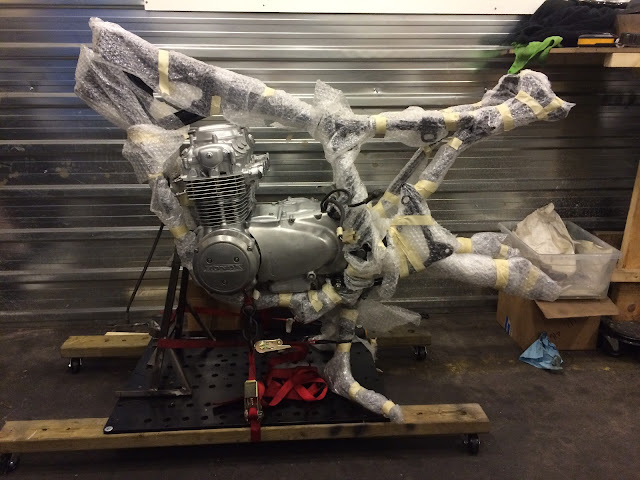
Looking good, friend. Fine work!

In 1979 Cycle World West in Toronto had these 1978 CB550K (brand new) on sale for I think $1999.
My girlfriend at the time Maureen surprised me, saying she wanted to buy one.
Sure it was a great deal, but...
She was kinda prissy, wore dresses, flowers in her hair, girlie shoes etc. - so I wasn't expecting that!
We were just kids like twenty years old but looking back, she must have really adored me...
Ah, well. Wouldn't be the last time I missed all the obvious signs, heheh.
She's probably somebody's grandmother, today... (Hi Maureen).

Back in the day, the F models had all black cases and cosmetics etc.
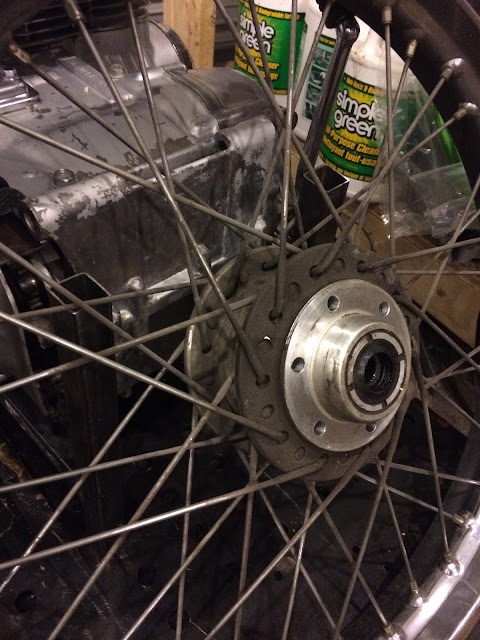
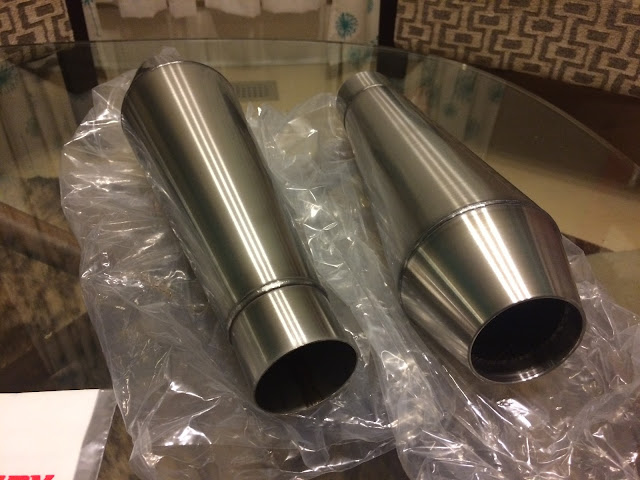
But they were pretty rare, 9 out of 10 you would see would be K models with four pipes.
(Really rare today is the early-seventies CB500-4 with its distinctive mufflers.)
Anyway, I picked it up new from the dealer for her and still remember the bike very well.

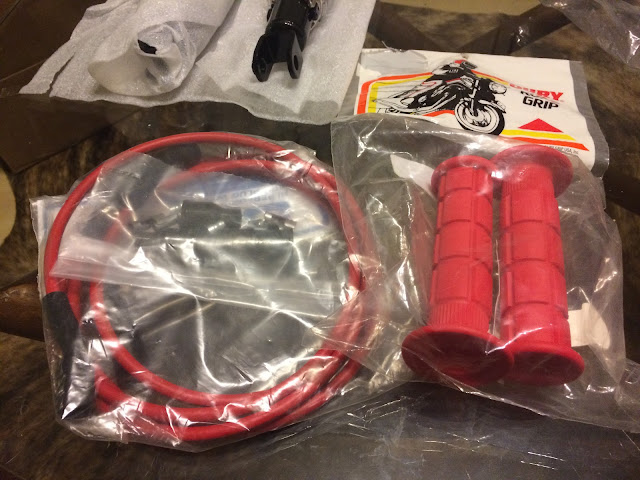
I think you can still get Dyna optical (or maybe they're magnetic) ignition triggers for them even today.
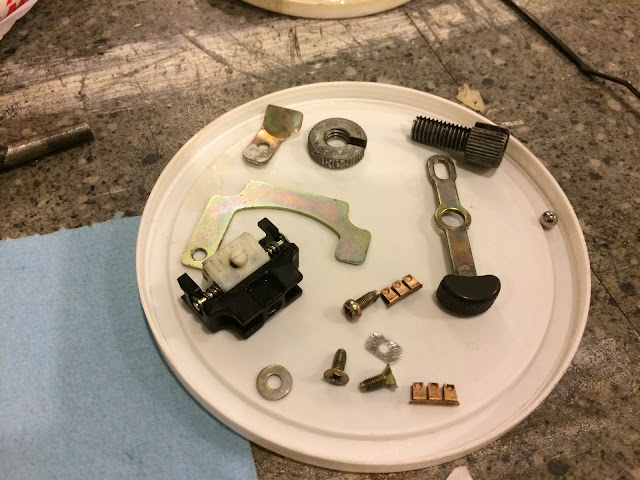
You won't like looking after the original breaker points and condensers very much...
Also Metzler Lasertec, Avon Roadrider AM26, and Bridgestone Battlax BT-45 tires are still available in the correct sizes for them!
And how are the pipes? Amazing if they haven't rotted away by now.

Keep the updates coming - and I'll be watching. :)
Regards
 
Gryphon, I am planning on converting to electronic ignition before the winter is out, but that can wait till the end of the build season. BTW, those ignitions are magnetic triggered.

At the start of this thread you can see pics of the chrome (pipes, fenders, etc) as I got them on the bike. They are not perfect by any means, but the fenders are I would say 8/10, and the pipes maybe 6.5/10. The chrome is great on the fenders, and the wheels. No pitting, still shiny. The pipes are not as ideal. Serviceable and definitely usable, but won't win any concours prizes (other than maybe the barn-find prize). they are 5-footers for sure. I have taken all of it off the bike, and stored it separately so that whoever buys this bike from me in the future will have a fighting chance to convert it back to stock if they want. I also didnt cut the frame, because that's just mean on these bikes.
 
Made a run to get all the parts that I need to finish the build (other than the tires). I will sort out the tires closer to the end of the summer. Mainly because the tires i want are back ordered, but also it will prevent accidental cuts in them when i am rolling the bike around my shop.


2.5" Gauges from Nickel Town Customs Dime City Cycles. All black, kmph, integrated warning idiot lights. I am really pleased with them actually. Not as cheap as I would have liked, but the alternative is to rebuild my OE clocks, and that would probably have cost the same in the end.

blogger-image--1357272235.jpg


blogger-image-320465982.jpg


The rest of the parts I bought from Glen @ FSM (support local).


I ended up grabbing 2 Cone Eng 12" Shorty Reverse Cone mufflers, 2 new shocks because the OE ones were blown, some nice Oury grips, a set of red plug wires (because red is faster, duh), and a tapered head bearing kit. I was waiting on the bearing kit so that I can start assembly since that is the first thing that would be going onto the frame.

blogger-image-127349712.jpg


blogger-image-1653127544.jpg


blogger-image--354611924.jpg


Those cones are super sexy. I have a killer idea for an exhaust, so I am very excited to try it out. Hint: it uses a butterfly valve.

blogger-image-530667220.jpg


blogger-image--1824017765.jpg


I also ordered a 1lb spool of Flux Cored Stainless Steel FCAW wire. This was really expensive in Canada, but around 1/3rd the price in the US with free shipping within the US, so I shipped this and my DCC gauge order to my US address (usaddressinc.com) and then went down to grab them this weekend.

blogger-image--1893807468.jpg

 
those cones look awesome, as do the shocks! But dang, please reconsider the red handlebar grips. I really enjoy following your thread - i cant believe your doing this out of a storage unit! Incredible effort is paying off.
 
:thumbup: This is all looking very nice, and expensive. Can't wait to see the finished product.
 
Matt, its not really that bad. The bike was less than a grand (albeit non-running, and lightly disassembled), and so far I've only got about a grand into it (including all these parts). the only major things left to buy other than paint is tires.
total expected cost: $2,500, not including my time, of which there is a whole lot invested. its either cash or time. I've chosen time to invest, and keep the budget low.
 
The most awkward part of re-assembly is getting the engine in the frame by yourself. I saw a CB550 rebuild thread on sohc4.net that showed that you could lay the engine on it's side, then (with the oil filter off) lay the frame over top to get it all loosely bolted together. So, I tried this and it went really smoothly. The tough part was actually getting the engine and frame back onto the little platform (the black thing in the background of the first pic) so that I could strap it all down. I had to basically clean-and-jerk the frame/engine with the center stand down and try to balance the front on the other stand I made. Awkward, to say the least. But I got it done.

blogger-image--1865640087.jpg


blogger-image--1164497052.jpg


blogger-image--1201036152.jpg


Engine in frame, next up, swingarm.

blogger-image-799026386.jpg


blogger-image-479405607.jpg


blogger-image--1471053689.jpg


blogger-image--963741035.jpg


blogger-image--684028082.jpg


Done. Next up, top tree and forks.

blogger-image-126307674.jpg


blogger-image-532542761.jpg


Now it is beginning to look like a bike again. I'm excited to press on.

blogger-image-1823468019.jpg
 
Did you pack those bearings properly with grease or just throw some on the outside?
 
yes. they were packed from the bottom, then the outsides wiped off to make assembly less messy, then put some extra grease on the outsides. The cages are tightly fit to the inner races, so packing is sorta a pain in the ass too. I had to use a syringe to inject grease into it from the bottom to get it started.
 
Matt, its not really that bad. The bike was less than a grand (albeit non-running, and lightly disassembled), and so far I've only got about a grand into it (including all these parts). the only major things left to buy other than paint is tires.
total expected cost: $2,500, not including my time, of which there is a whole lot invested. its either cash or time. I've chosen time to invest, and keep the budget low.

How much were the shocks and mufflers? I'd like to modernize both on my FJ but looks like new aftermarket options are around $500 in each case. Doesn't seem worth it.

You really bought those gauges, mufflers and shocks for less than a grand total?

Edit - I just looked up DCC, damn those gauges are really inexpensive.
 
Last edited:
Matt, yeah. DCC was the only place other than a random eBay auction that I could find an all black gauge in kmph. After shipping and exchange the gauges were about $250 for the set. The bill for all the stuff from Glen @ FSM was around $700. So yeah, the only thing I don't include in the cost totals is stuff like miscellaneous cans of spray paint and degreaser and such. Im sure they add up quickly, but at the same time, its more of a petty-cash situation when I buy those. I skip the Beer Store on a friday night and then just grab a rattle can or two on my way to the shop. I don't know what that says about my social life, but at least the bike looks good, hahaha.
 
Was fortunate enough to be able to get a few good sessions in at the shop lately. This one was particularly good because I started it off with some crepes in Ed (bocutter's) workshop down the hall. Who's gonna say no to that spread???

blogger-image--1590835956.jpg


blogger-image-1510454597.jpg


Threw the wheels together and put them on the bike.

blogger-image-2065890574.jpg


blogger-image--1096850811.jpg


I have the FSM, Owners Manial and the complete Parts Fiche for the bike. Its helpful because when I took it apart I just ripped it all off and threw them in miscellaneous piles.

blogger-image-1103812320.jpg


I guess it's technically a roller now.

blogger-image--1098929206.jpg


blogger-image--1085266661.jpg


blogger-image--202795693.jpg


blogger-image-218494869.jpg


blogger-image--1467310941.jpg


blogger-image--348286844.jpg
 
With everything else on the bike getting a deep clean, putting the old dusty electronics back on without cleaning them up would be a disservice to the whole build.

I tried as best I could to clean it without doing any damage to the coatings or electronics. Got in touch with the folks from SImpleGreen and explained what I wanted to do, and they advised that SimpleGreen ProHD is the one that I should use to prevent corrrosion on the various metals in the components.

I used a rag and a brush to gently clean all the surfaces, and a quick rinse in water as per the instructions.After that, I used wire dryer and electrical contact cleaner as needed to make sure that all the water was displaced.


Before:

blogger-image--152921163.jpg


blogger-image--2137972319.jpg


blogger-image-1649904086.jpg


blogger-image--1027357847.jpg


blogger-image--271140612.jpg


During:
blogger-image--1606317975.jpg


blogger-image--496175890.jpg


blogger-image--1759019941.jpg


blogger-image-617826133.jpg


blogger-image-490421426.jpg


I was really happy with how it all turned out. The original tape didn't unravel and the SimpleGreen cleaned off all the grime really well. The harness and plugs look new.

blogger-image--1141930800.jpg


blogger-image--973707429.jpg


blogger-image--1855315885.jpg


I won't know for sure that I didn't F something up until I apply power to the whole bike and test, and I won't do that until the very last moment to give all the connections as much of a chance as possible to have any left over water evaporate. I would rather not have the replace components. I don't think I did any damage, but with the old components on the bike, I don't really know. Only time will tell.
 
Time to put some stuff onto other stuff, and then onto the bike. First up, the new plug wires.

blogger-image--1160837509.jpg


Old:
blogger-image-277601890.jpg


New. I left them a bit long so that I could trim as needed once everything else in that area has been installed. The reason they need to be trimmed is that the splice is at a place that doesn't really let you curve the wire as it might need to be, so to prevent them hanging down onto the exhaust or something, I will need to play around with them once the last of the stuff is attached.
blogger-image--836890656.jpg


blogger-image-1332560837.jpg


The main electronics thingy (board? component bank?) is installed and the main body harness was routed as per the FSM. Coils bolted down too.

blogger-image--1787647153.jpg


blogger-image--1182649707.jpg


Bocutter spun up some rad washer/spacer things for my rear shocks. They trap the shock on the mounting boss, while also giving me 25 extra HP because they are red.
Bad Ass! 5/5 Ichiban Moto stickers!

blogger-image-463091367.jpg


blogger-image--351860603.jpg


I also got a set of crash bars from a fellow rider down the street (Frank). They aren't specifically for a CB550, but I think they are for a CB750. I will need to chop the tabs off and re-make them, but it saves me lots of work over building them from scratch. If anyone wants to trade these for a set of CB550 ones, speak now or forever hold your peace. You have about 2 weeks before these have their date with the angle grinder.

blogger-image-1274844176.jpg


blogger-image--1670449450.jpg


blogger-image-654332862.jpg


Back
Top Bottom